PetLucid uygulama ikonu

PetLucid: Your personal
multi-pet tracking app.

Discover how to use PetLucid step by step — from reminders to health records, vet tracking to backups.

Coming soonApp Store Coming soonGoogle Play
App Showcase

See what's waiting for you in the app

A closer look at the real screens of PetLucid.

Home Screen Guide

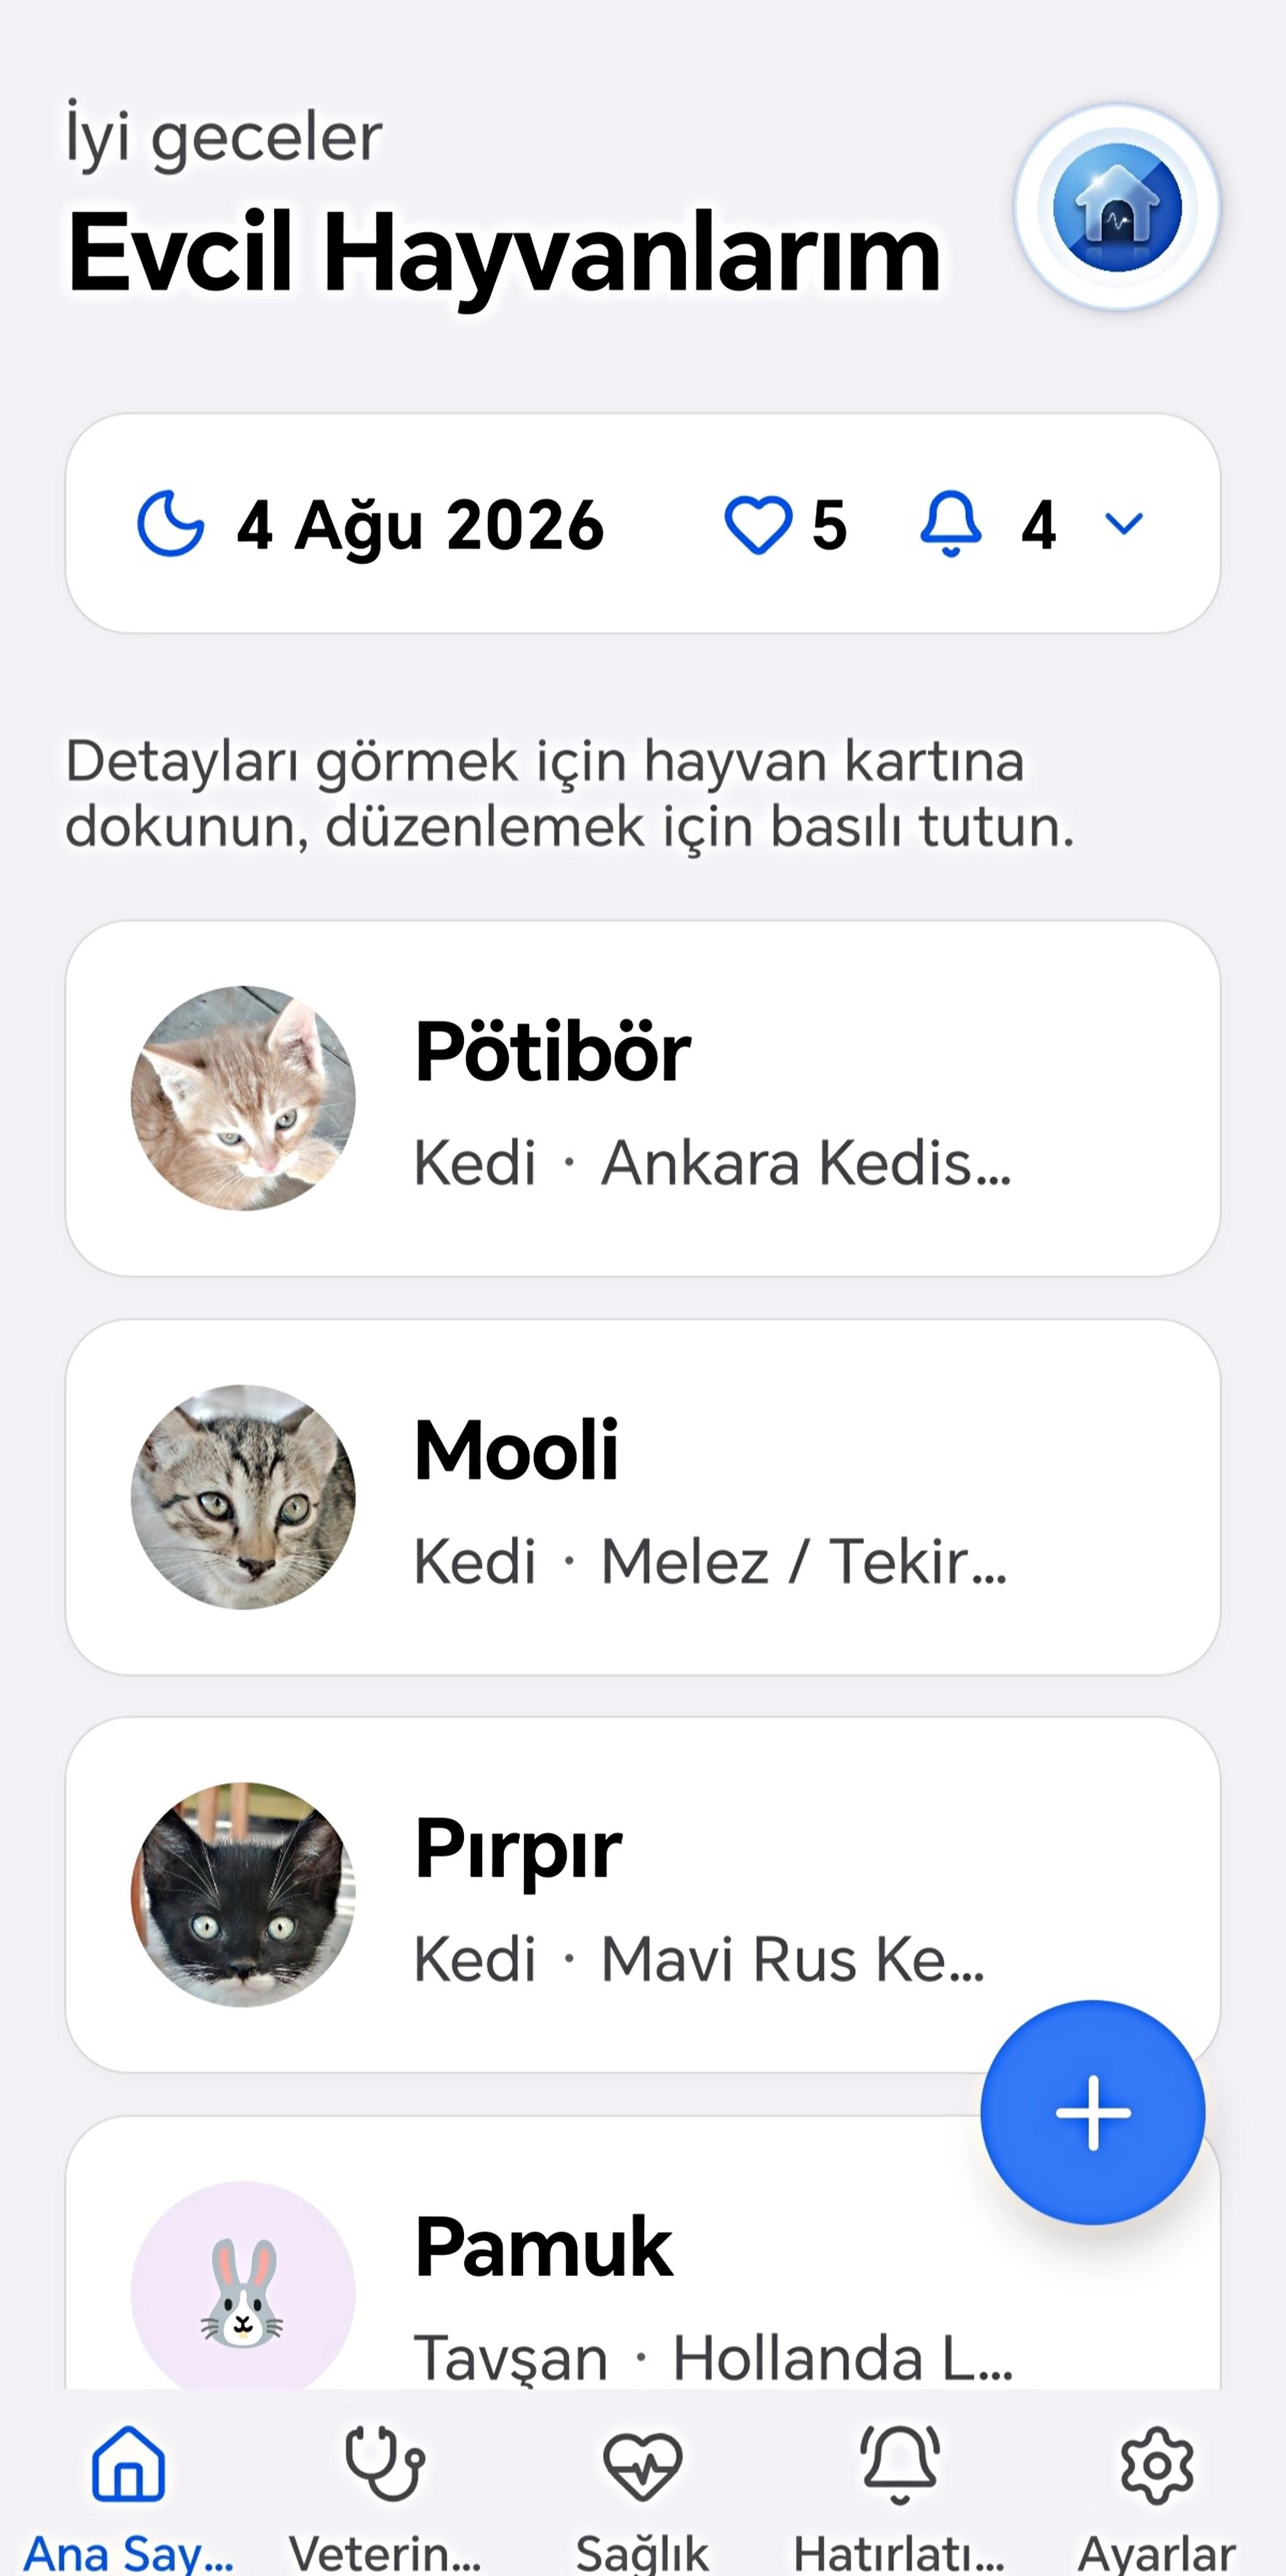
Empty State and Adding a Pet

When you first open the app and haven't added a pet yet, you'll see an empty state guiding you to add one. Tap the "+" button in the bottom right to add a pet. On the screen that opens, you can enter their photo, name, s

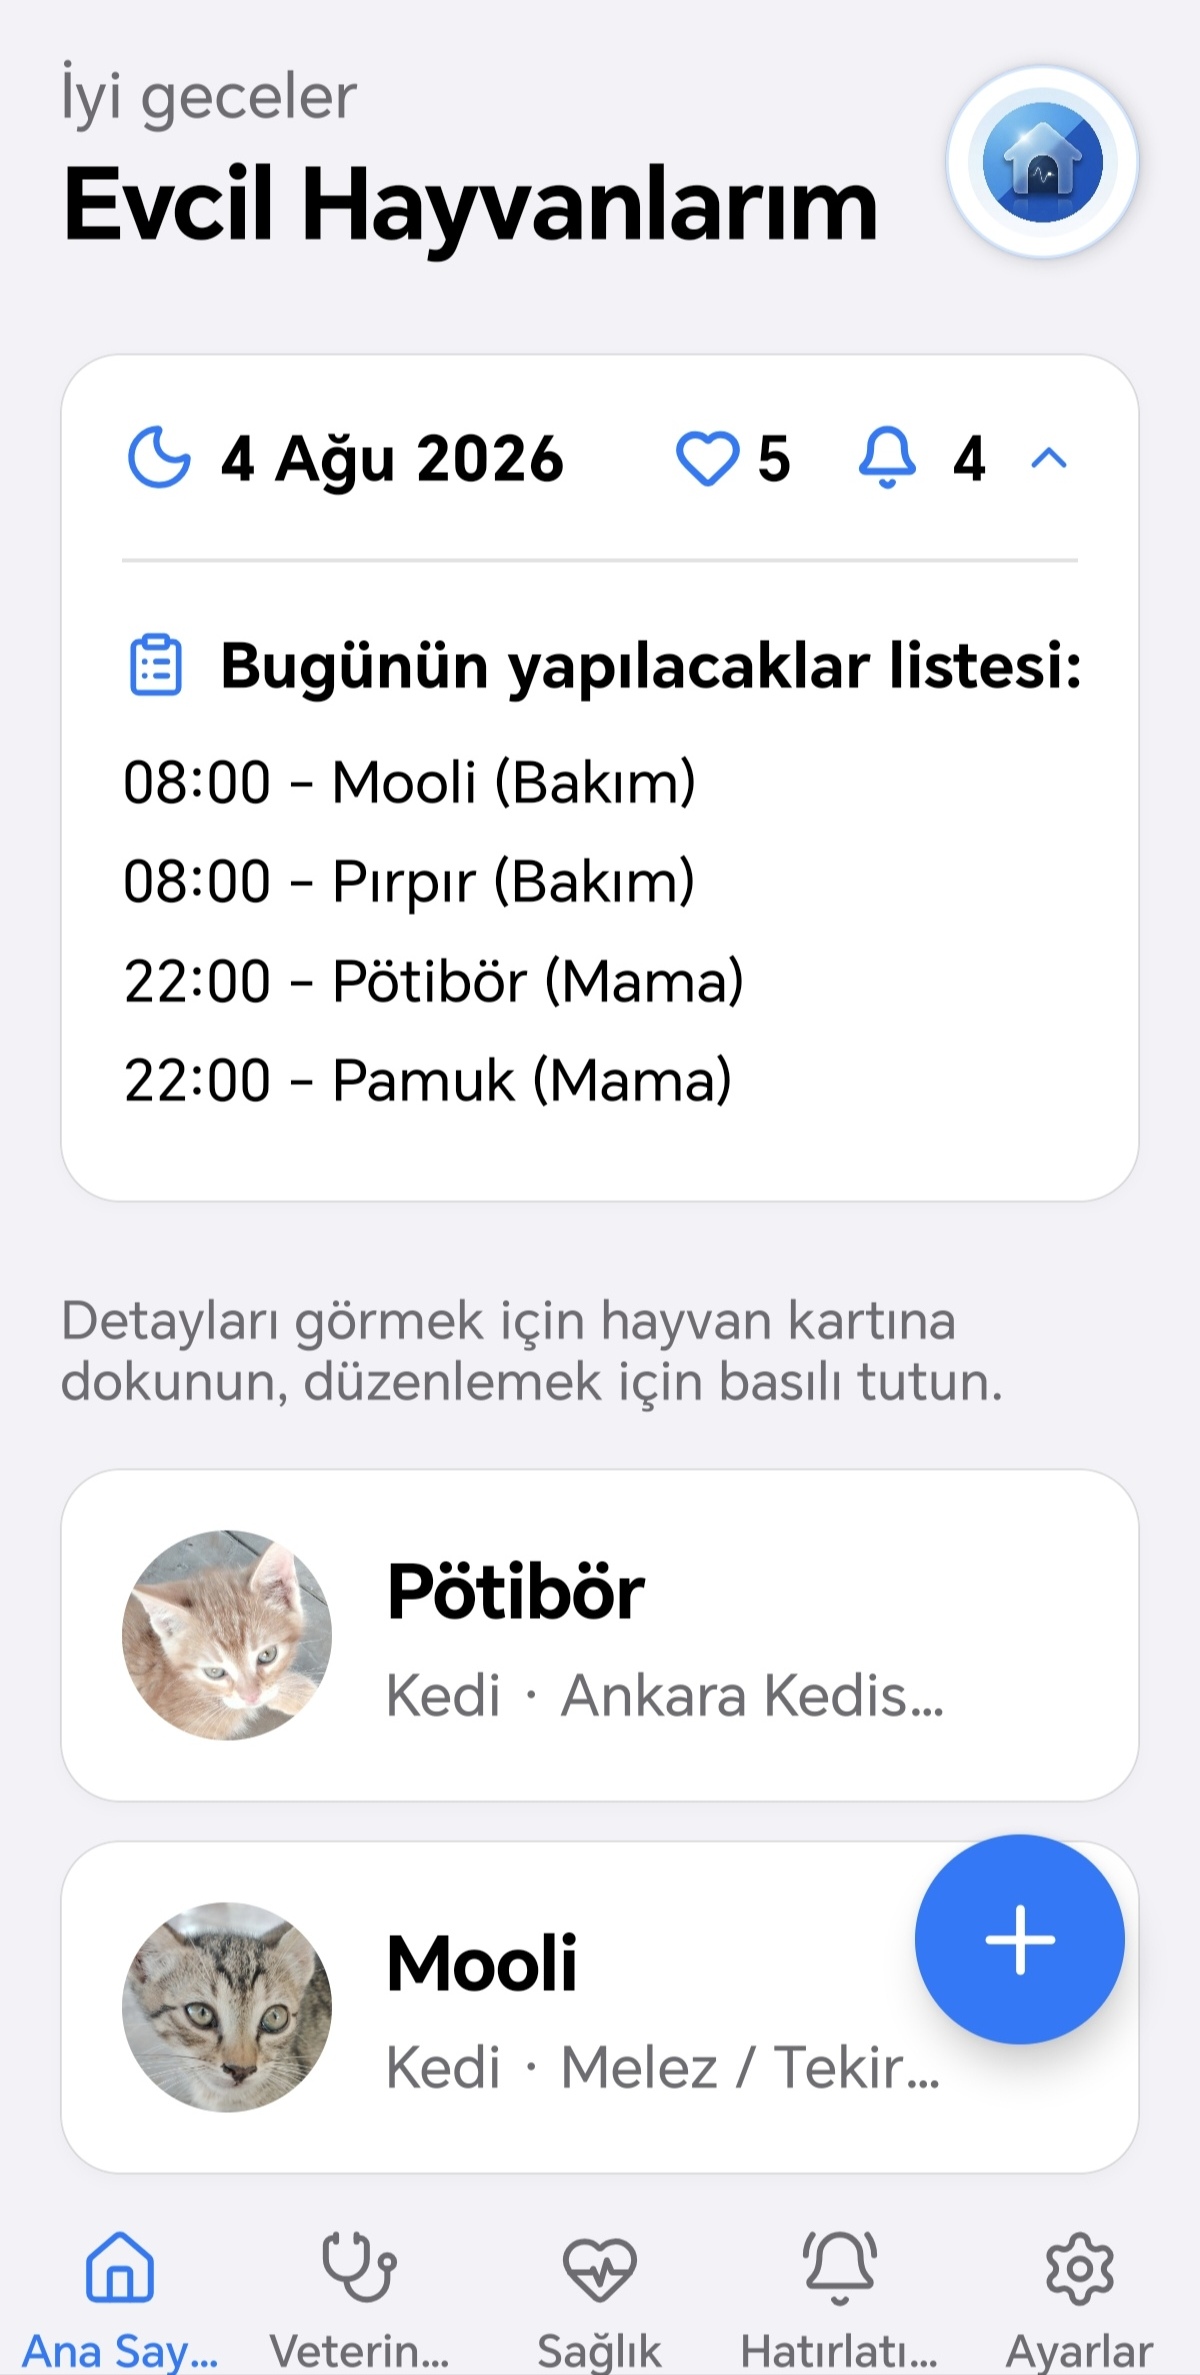
Today's Summary Card

Once you've added a pet, a short summary card appears at the top of the screen. It shows today's date, your number of active pets, and how many reminders are set for today. Tapping the card expands it into a list of toda

Pets Guide

Pet Profile Screen

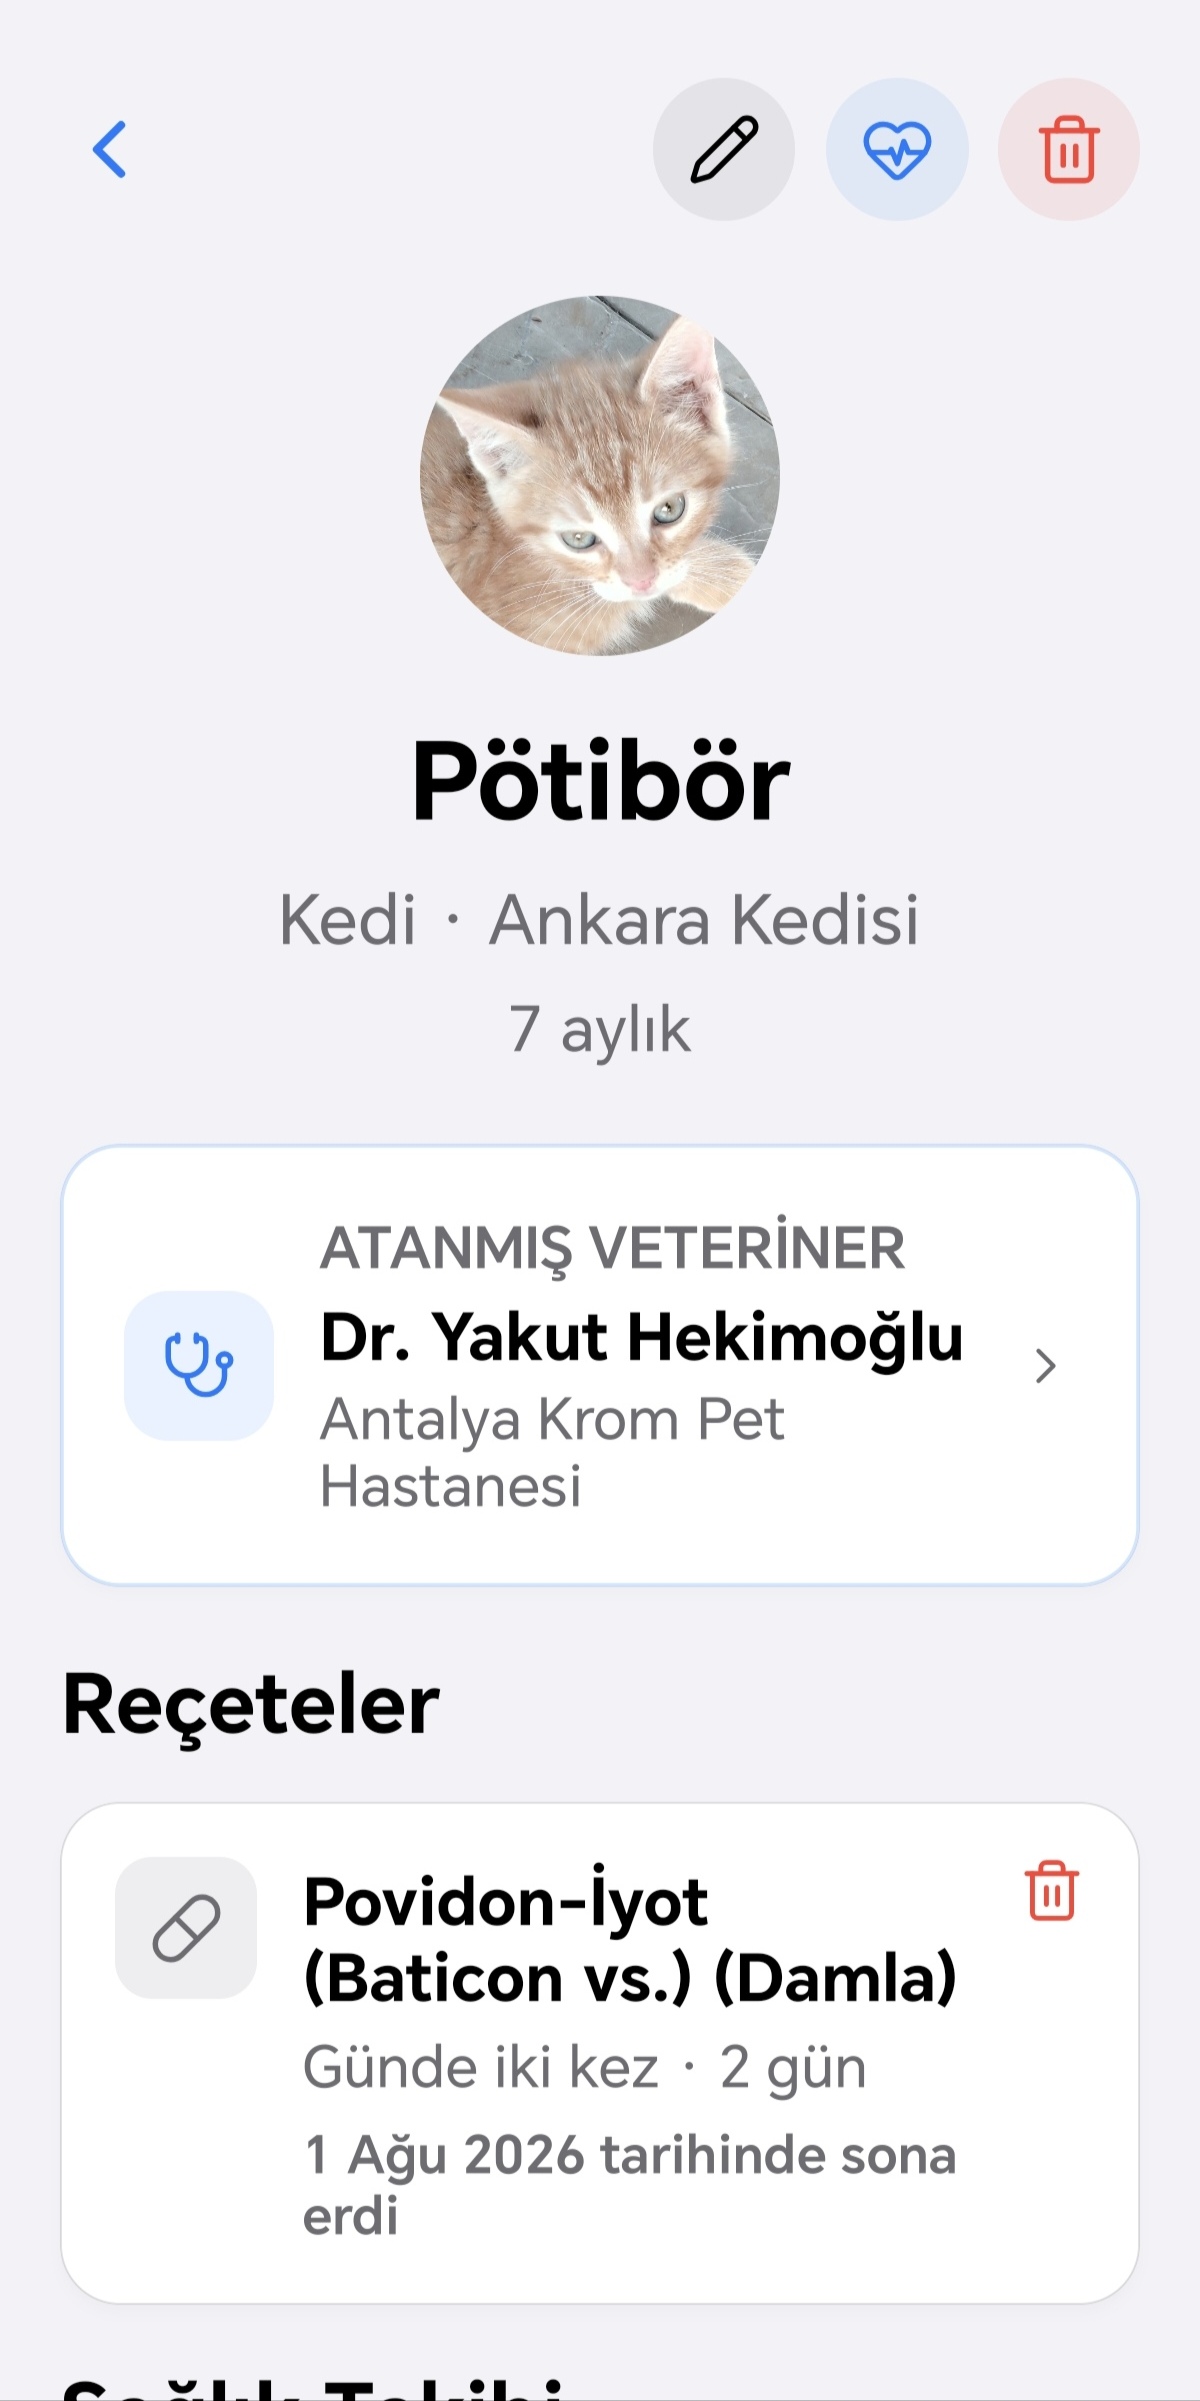
Tapping a card in your pet list opens that pet's profile screen. Here you'll see their photo, name, species/breed, age, and bio (if added). Tap the pencil icon in the top right to edit, tap the heartbeat icon to jump to

Editing, Farewell, and Deletion

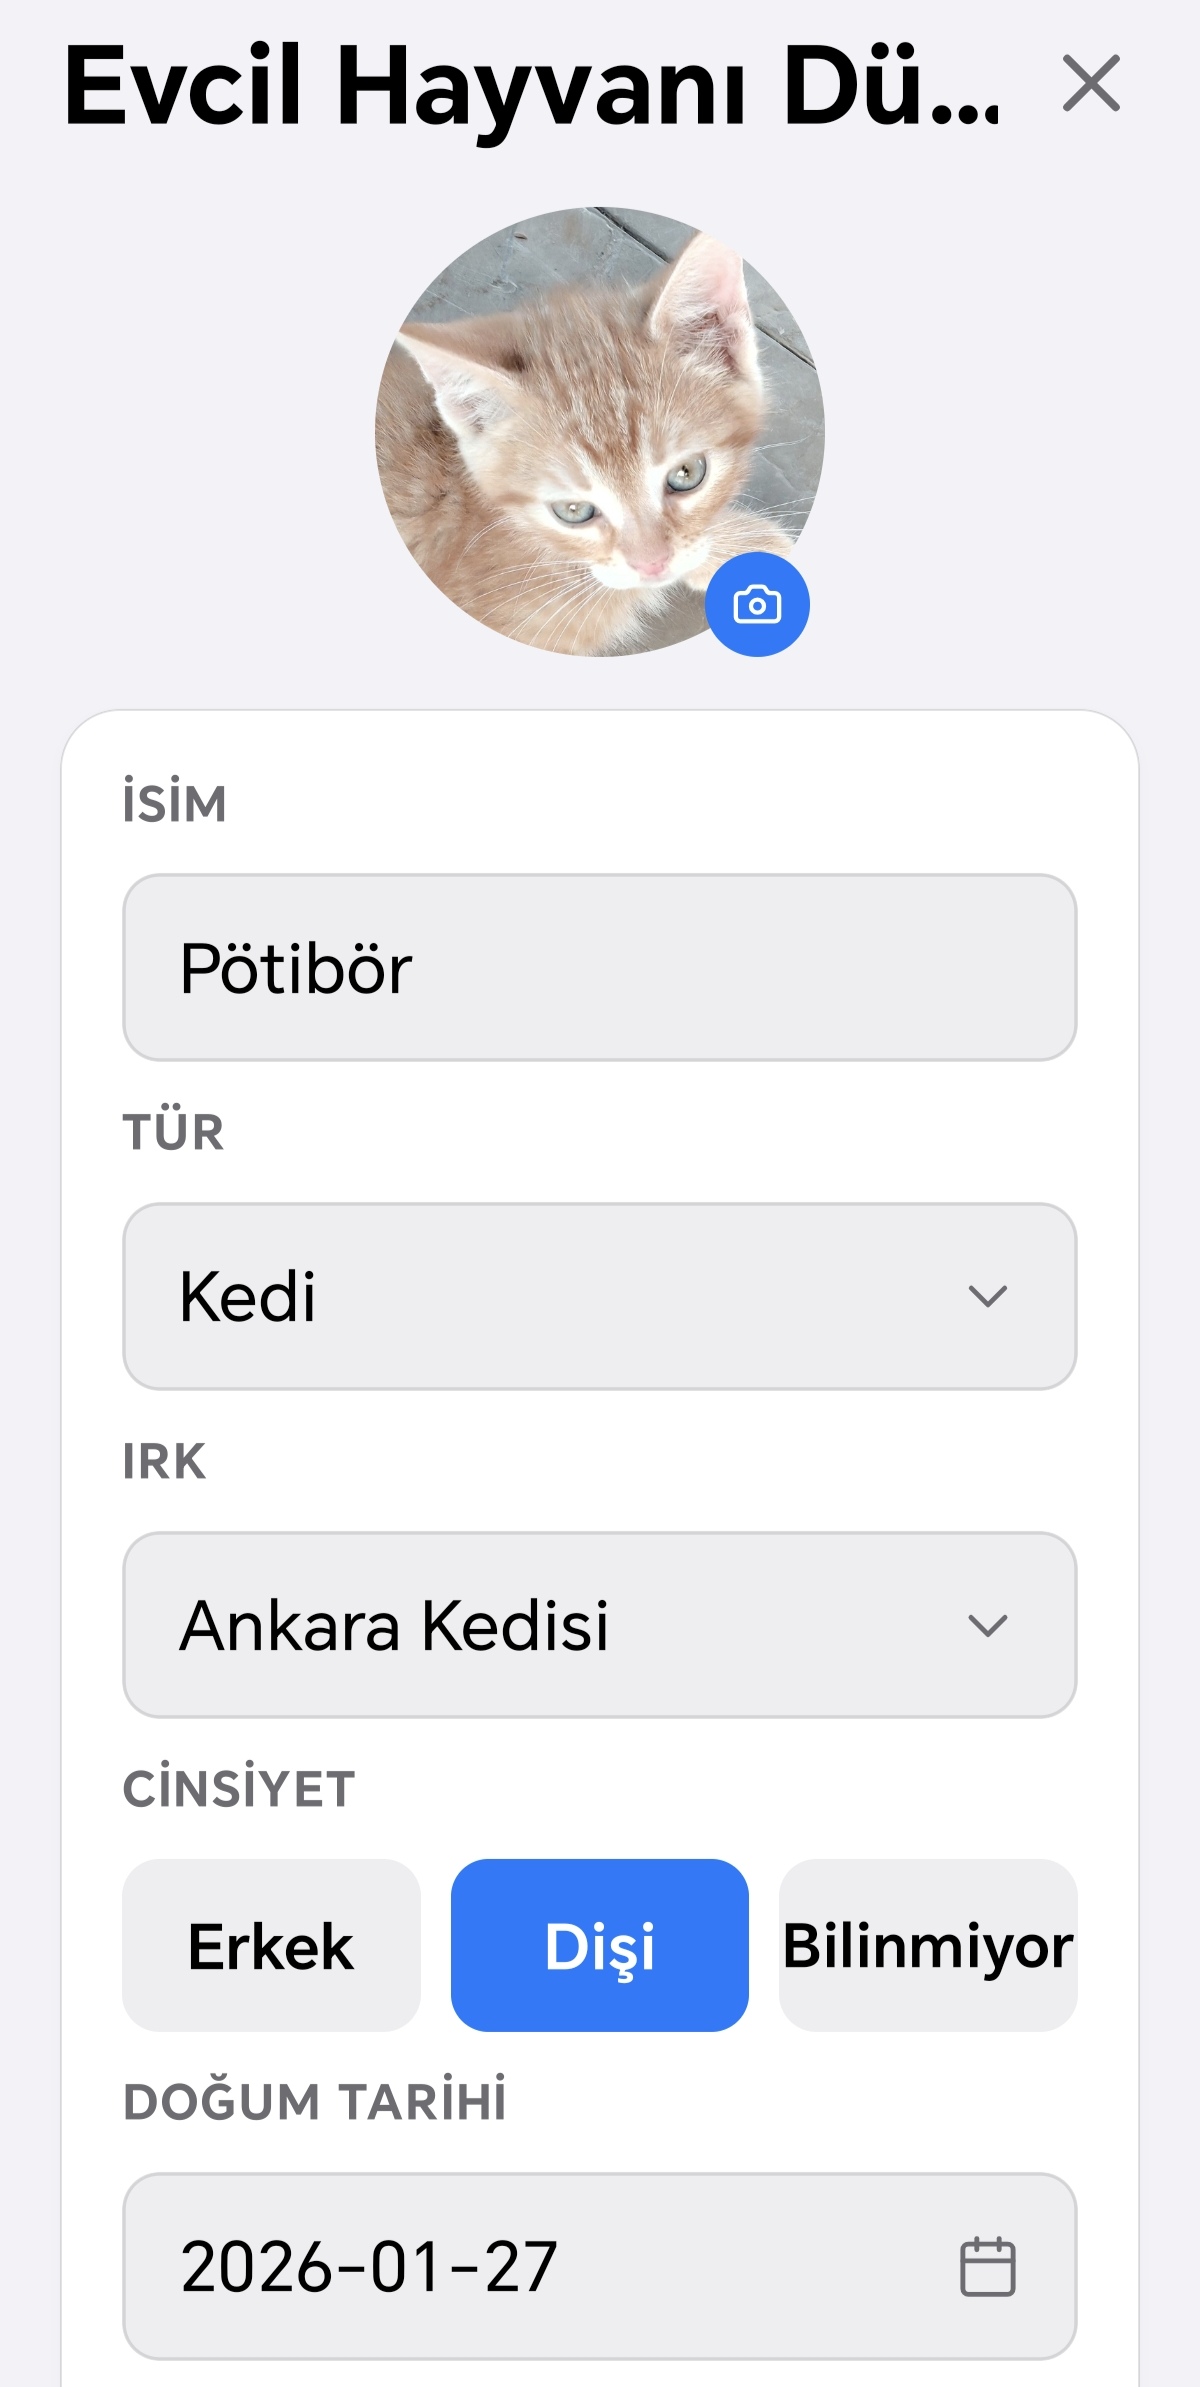
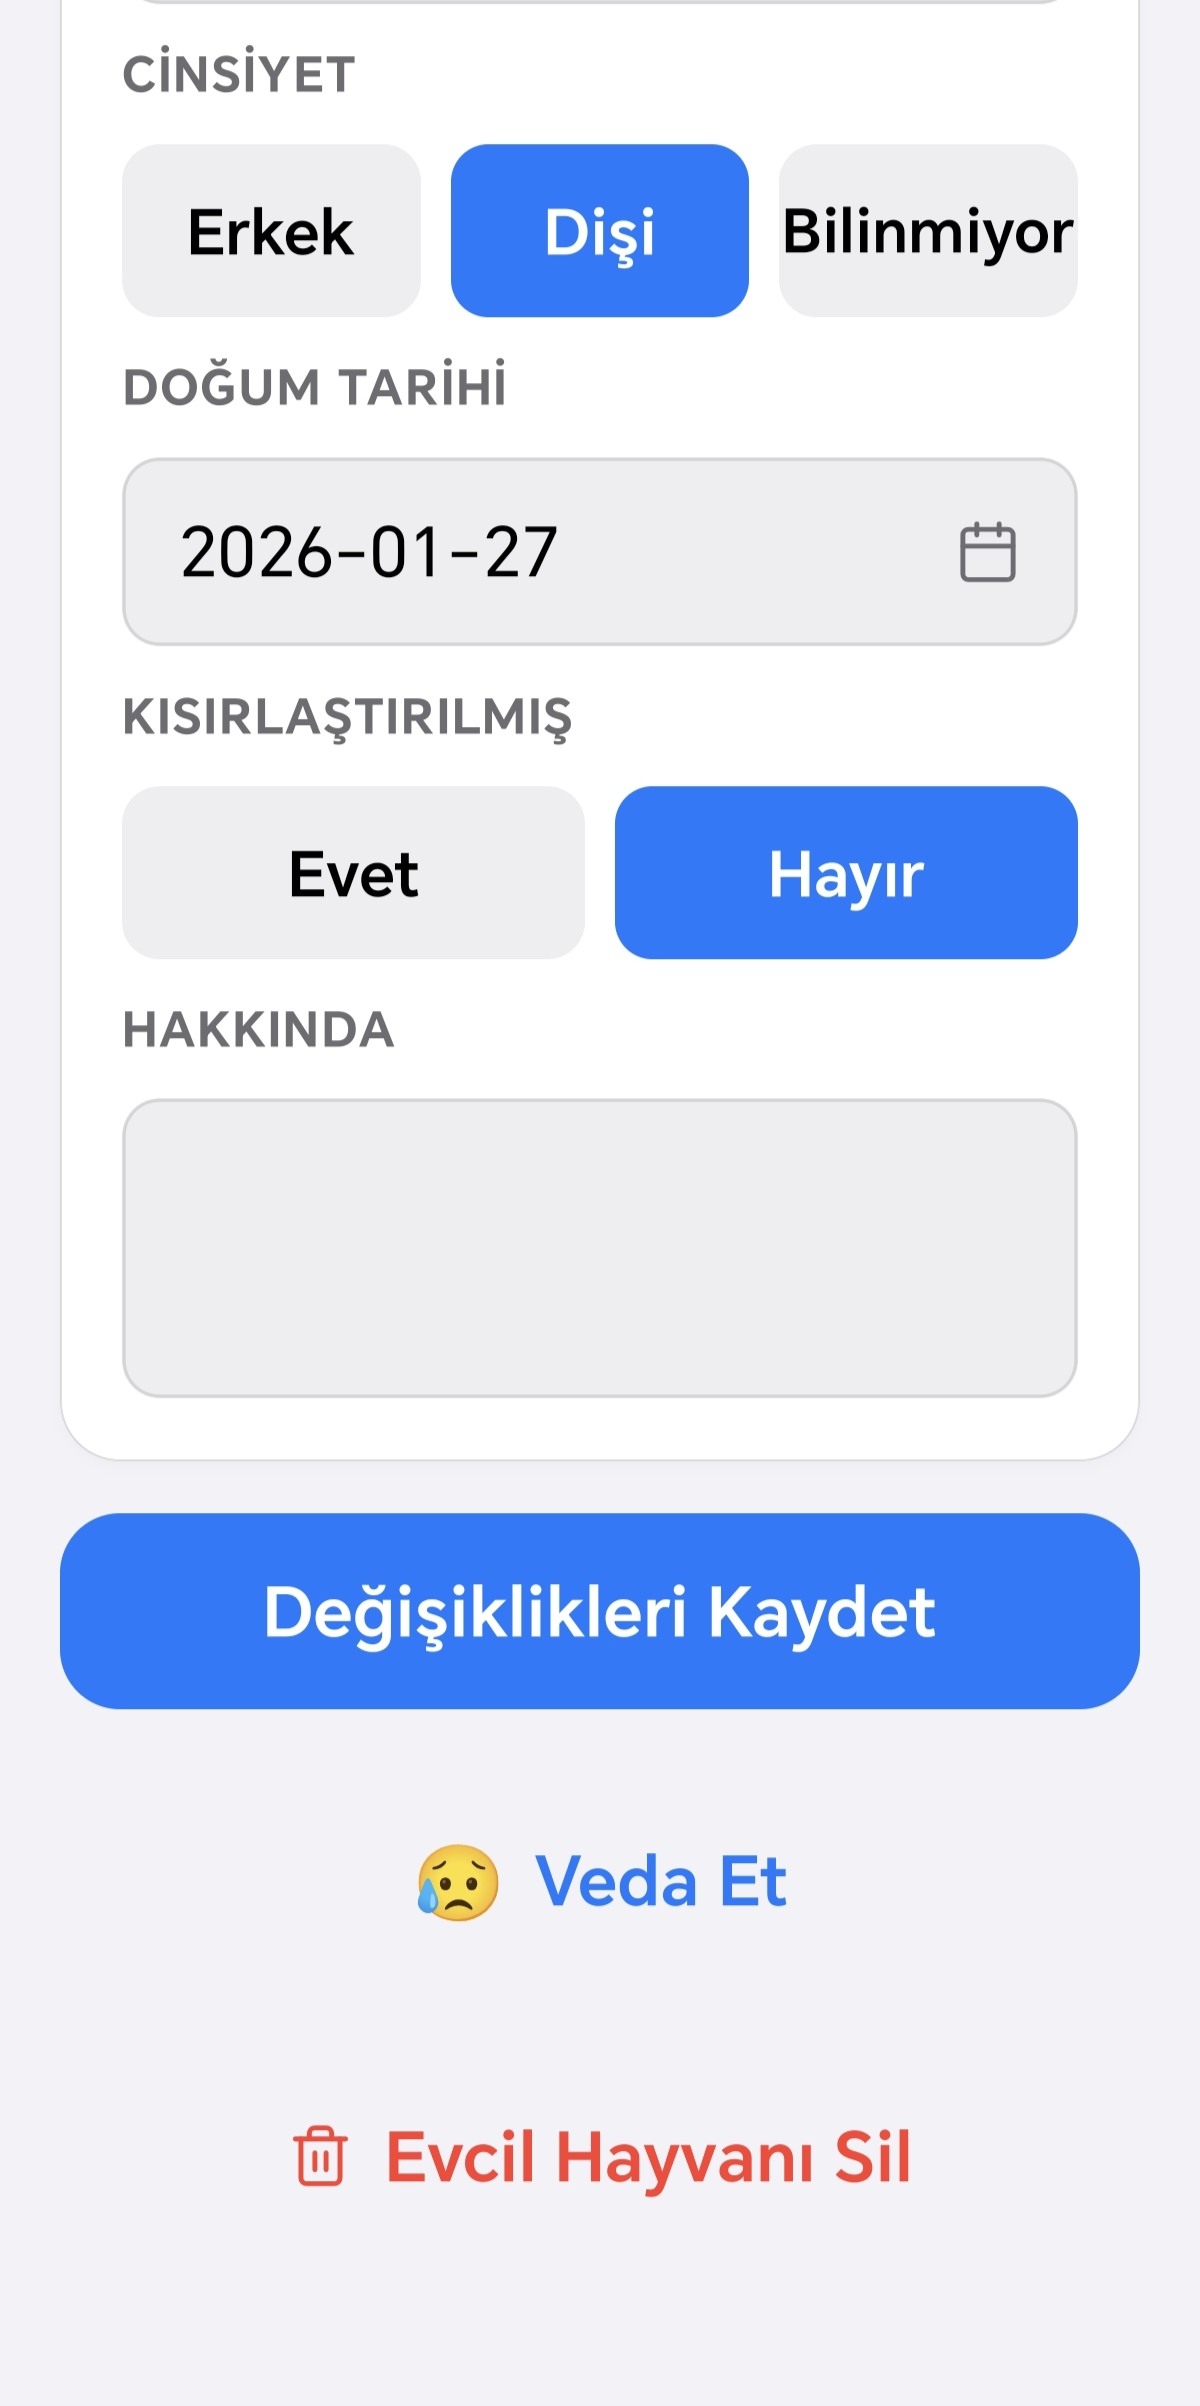
Long-pressing a pet card on the home screen takes you straight to that pet's edit screen. Here you can update their photo, name, species, breed, gender, birth date, neutered status, and bio. From this screen you can also

Farewelled Pets

Farewelled pets appear in a separate, slightly faded section below your active list. Their profile includes a button to restore them to your active list.

Vet Guide

Empty State & Adding a Vet

When you open the app for the first time and have no vet saved yet, an empty screen appears inviting you to add one. Tap the "+" button at the bottom right to add a vet. In the screen that opens, you can enter the vet's

Vet Detail Screen

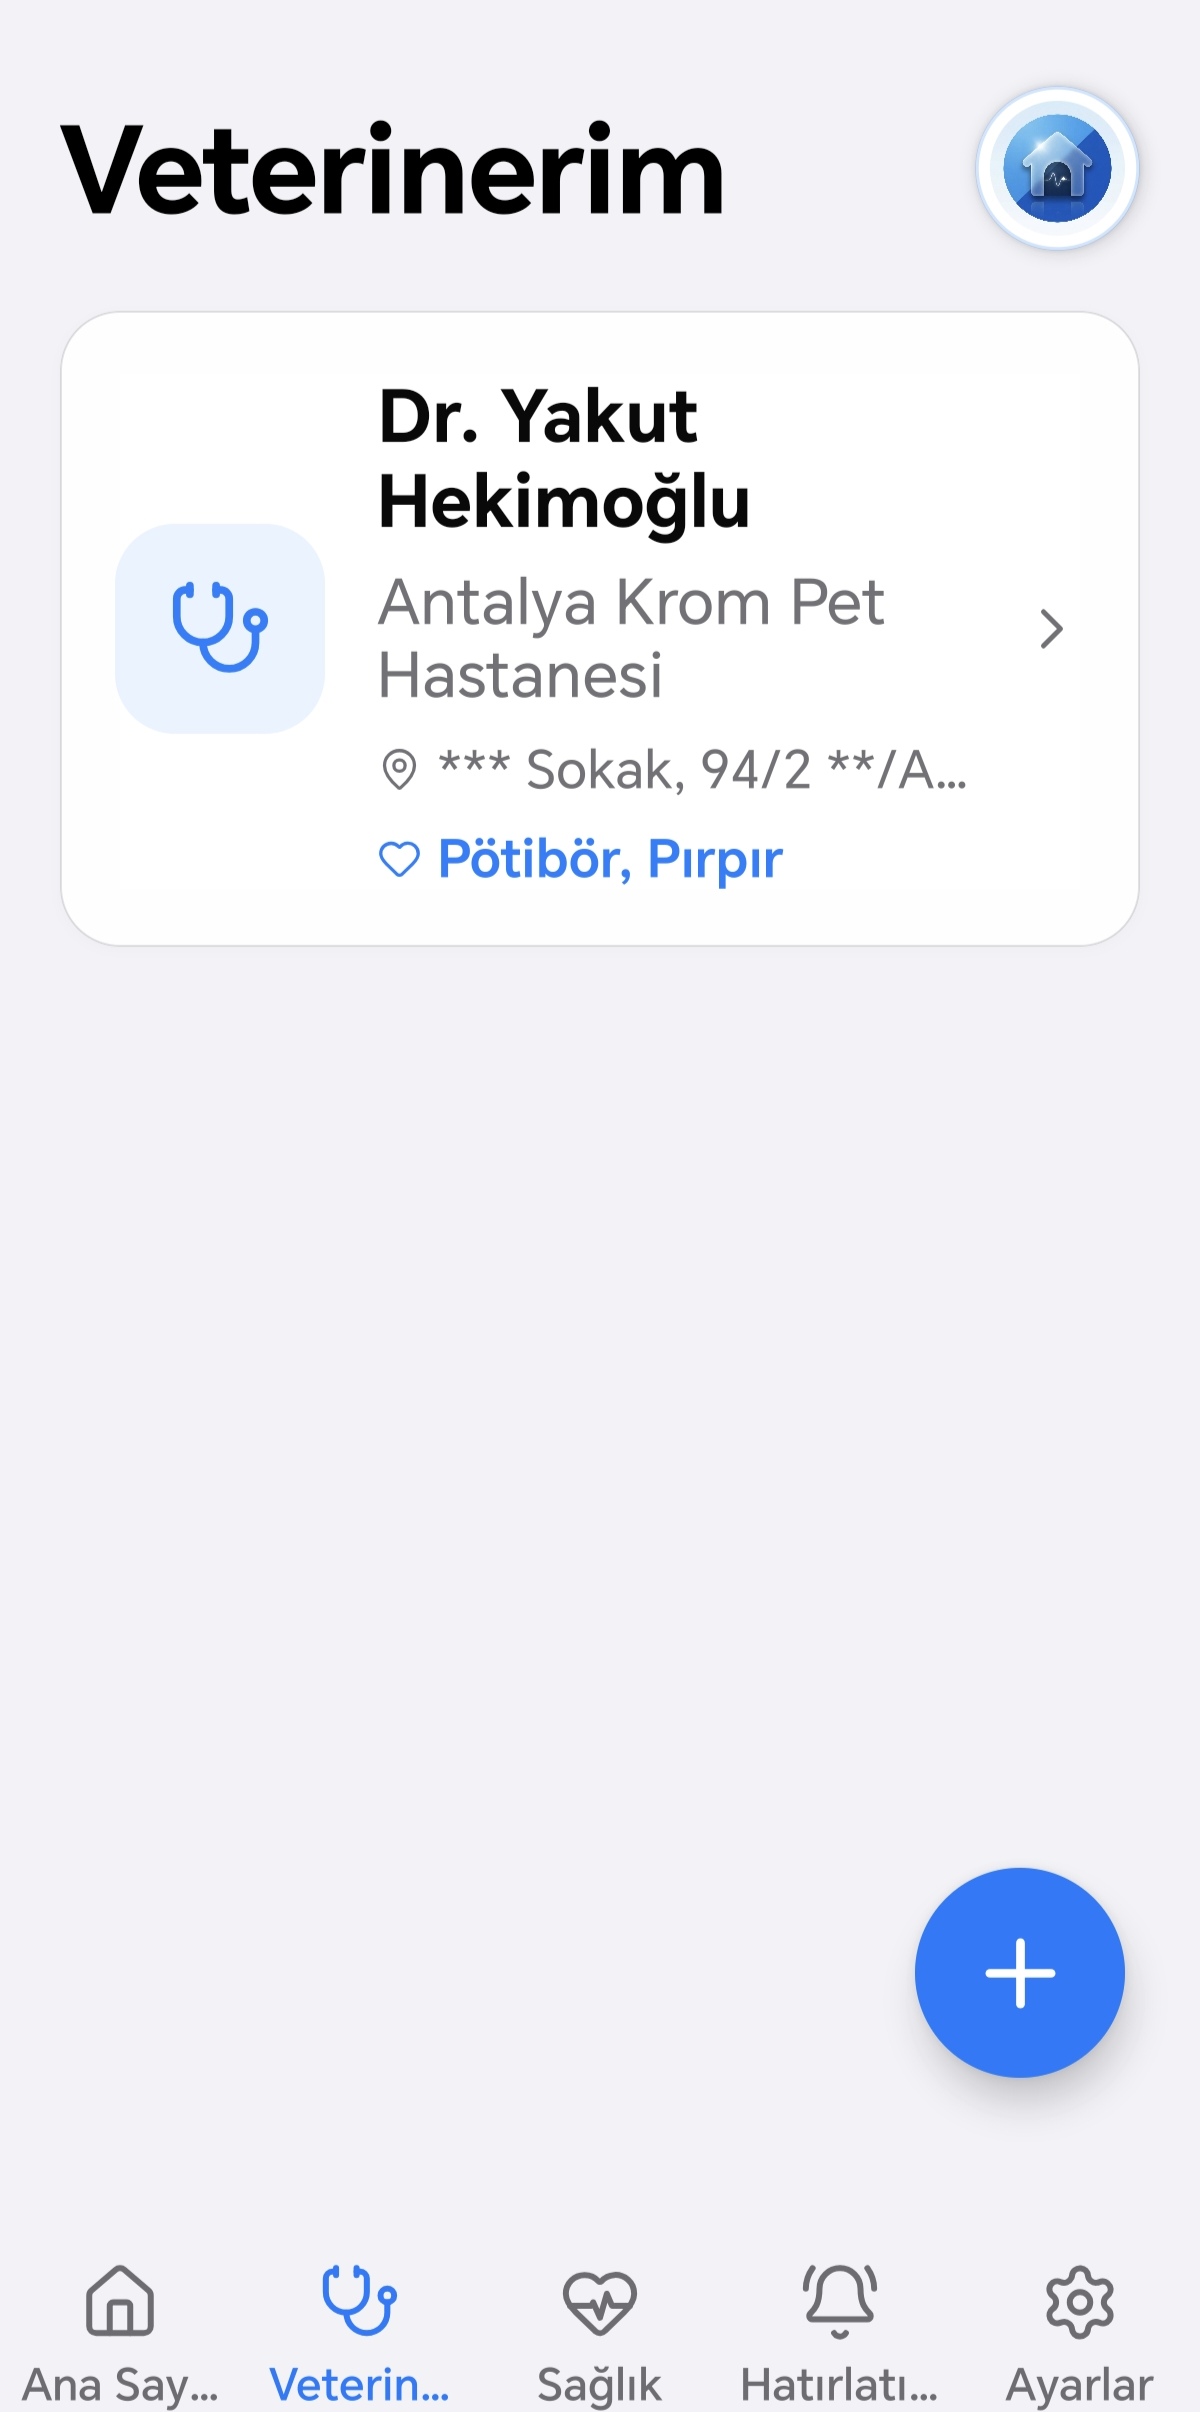
Tapping a vet card in your list opens the detail screen. Here you will find: the vet's photo, name, and clinic name if available; address, phone, and email listed on separate lines if provided; pets linked to this vet wi

Health Guide

Reminders Guide

Empty State

If you have no reminders yet, an empty state appears on the screen; tap the button there to start creating your first reminder.

Creating a Reminder

Tapping the plus button at the bottom right opens the new reminder screen. Here, in order: you type a title; you choose which pet(s) the reminder applies to (you can select more than one pet); you choose one of nine type

Monthly Calendar

On the home screen, a monthly calendar sits above the list; it's collapsed by default, and you can tap it to expand or collapse it. When expanded, days with active reminders show a small number badge, and days with a vet

Views

You can browse reminders in three different views: By Animal (each pet has its own folder, with type-based subfolders inside), By Type (each type has its own folder, with pet-based subfolders inside), and Show All (a sin

Settings Guide

Which animal are we calculating for?

Choose a card, then enter its details.

Home Screen Guide

index.empty_state.jpg
When you first open the app and haven't added a pet yet, you'll see an empty state guiding you to add one. Tap the "+" button in the bottom right to add a pet. On the screen that opens, you can enter their photo, name, species, breed, gender, birth date, neutered status (and date, if neutered), and a short bio. A free account allows one pet; adding a second pet takes you to the upgrade-to-premium screen (Premium feature).
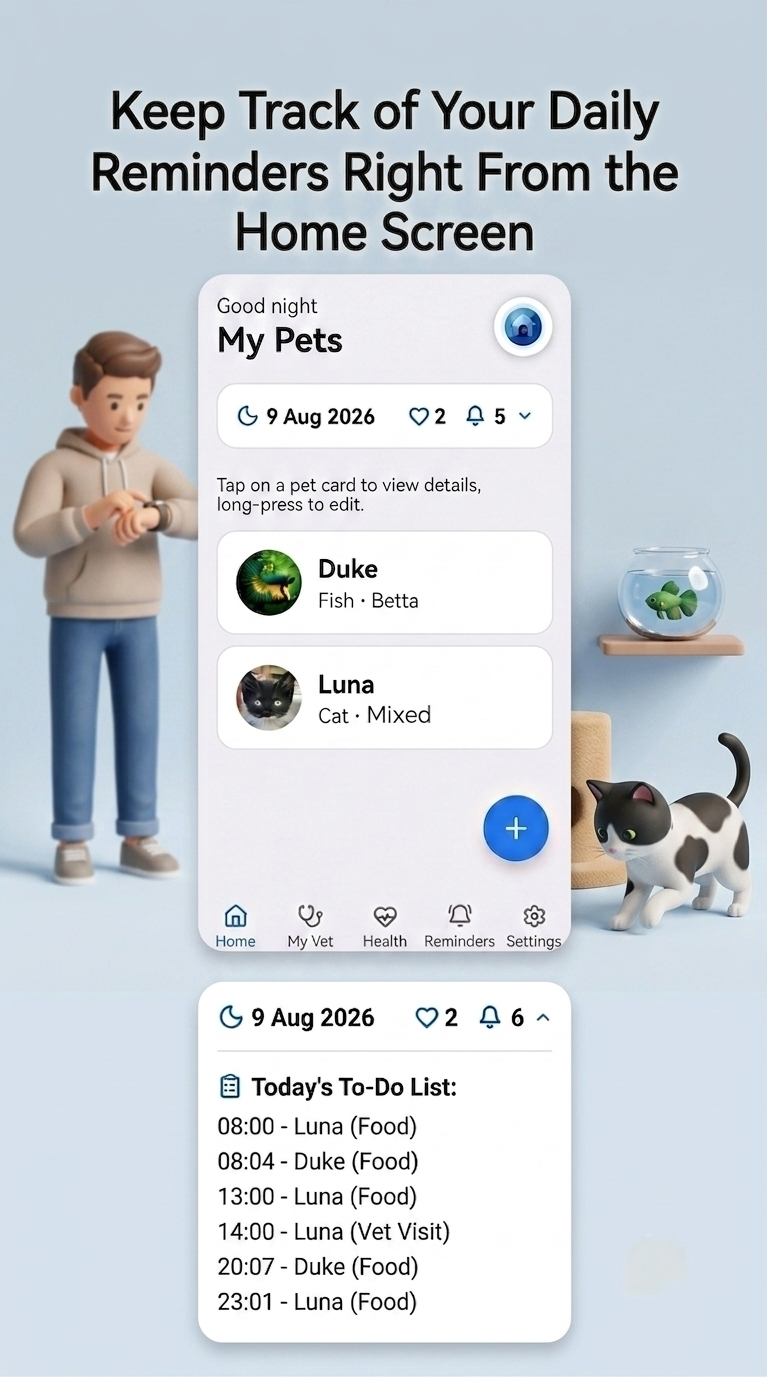
Once you've added a pet, a short summary card appears at the top of the screen. It shows today's date, your number of active pets, and how many reminders are set for today. Tapping the card expands it into a list of today's reminders sorted by time, with each row showing the time, pet name, and reminder type. If there are no reminders set for today, you'll see a message letting you know.

Pets Guide

pets.profile.jpg
Tapping a card in your pet list opens that pet's profile screen. Here you'll see their photo, name, species/breed, age, and bio (if added). Tap the pencil icon in the top right to edit, tap the heartbeat icon to jump to the Health tab with that pet selected, or tap the trash icon to permanently delete the pet (a confirmation is required). If a vet is assigned to the pet, their name and clinic (if any) appear in a card — tap it to go to the vet's detail screen. Active prescriptions are listed with the medication/vaccine/vitamin name, frequency, duration, diagnosis (if any), and whether they're active; you can delete a prescription with the trash icon, which also removes any reminders linked to it. Health tracking categories (nutrition, grooming, weight, height, walks, expenses, vet, diagnosis, medication, vaccine, vitamin, radiology, lab test) are listed as cards — tap any card to open that category's health log.
Long-pressing a pet card on the home screen takes you straight to that pet's edit screen. Here you can update their photo, name, species, breed, gender, birth date, neutered status, and bio. From this screen you can also say farewell to your pet (optionally choosing a reason) or permanently delete them. You can also restore a farewelled pet back to your active list from here.
Farewelled pets appear in a separate, slightly faded section below your active list. Their profile includes a button to restore them to your active list.

Vet Guide

vet.empty_add.jpg
When you open the app for the first time and have no vet saved yet, an empty screen appears inviting you to add one. Tap the "+" button at the bottom right to add a vet. In the screen that opens, you can enter the vet's photo, name, clinic name, address, phone number, and email. If you have registered pets, you can also mark which of them are linked to this vet.
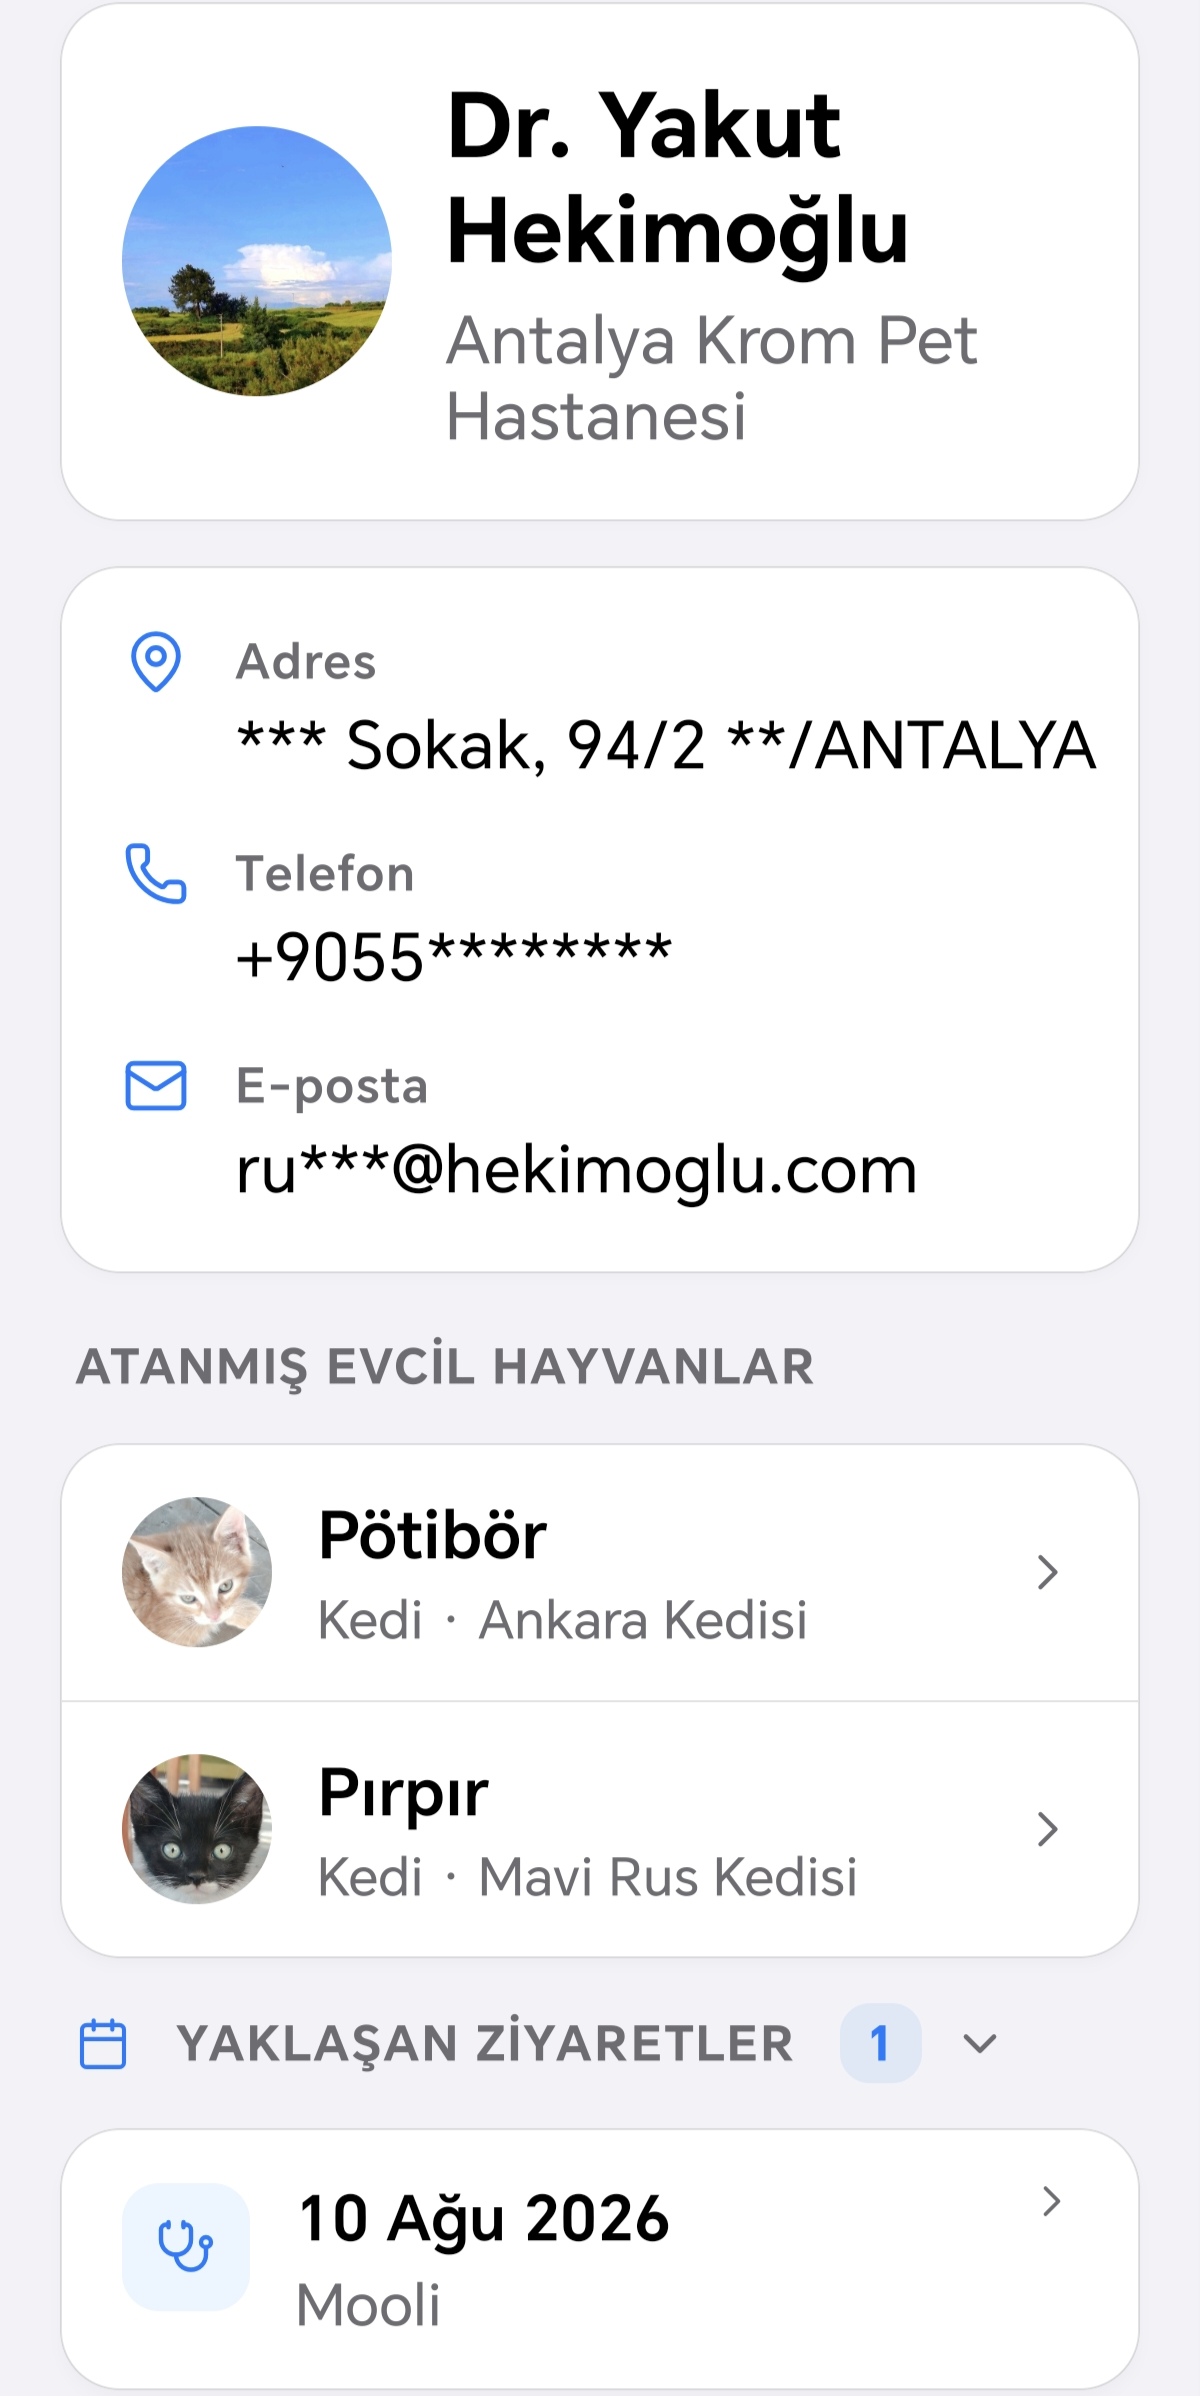
Tapping a vet card in your list opens the detail screen. Here you will find: the vet's photo, name, and clinic name if available; address, phone, and email listed on separate lines if provided; pets linked to this vet with their names and species — tapping a pet takes you to that pet's Health tab. If no pets are linked, a reminder note and a link to the vet's edit screen are shown. You can edit the vet's information by tapping the pencil icon at the top right, or permanently delete the profile by tapping the trash icon (confirmation required). Vet visit records logged in the Health module are displayed in two sections: "Upcoming Visits" and "Past Visits" — you can tap each heading to expand or collapse it; the Upcoming Visits section is expanded by default when the screen opens. Tapping a visit record shows its date, the pet involved, the visit reason, and any notes. If there are no visit records, a message is shown to indicate this.

Health Guide

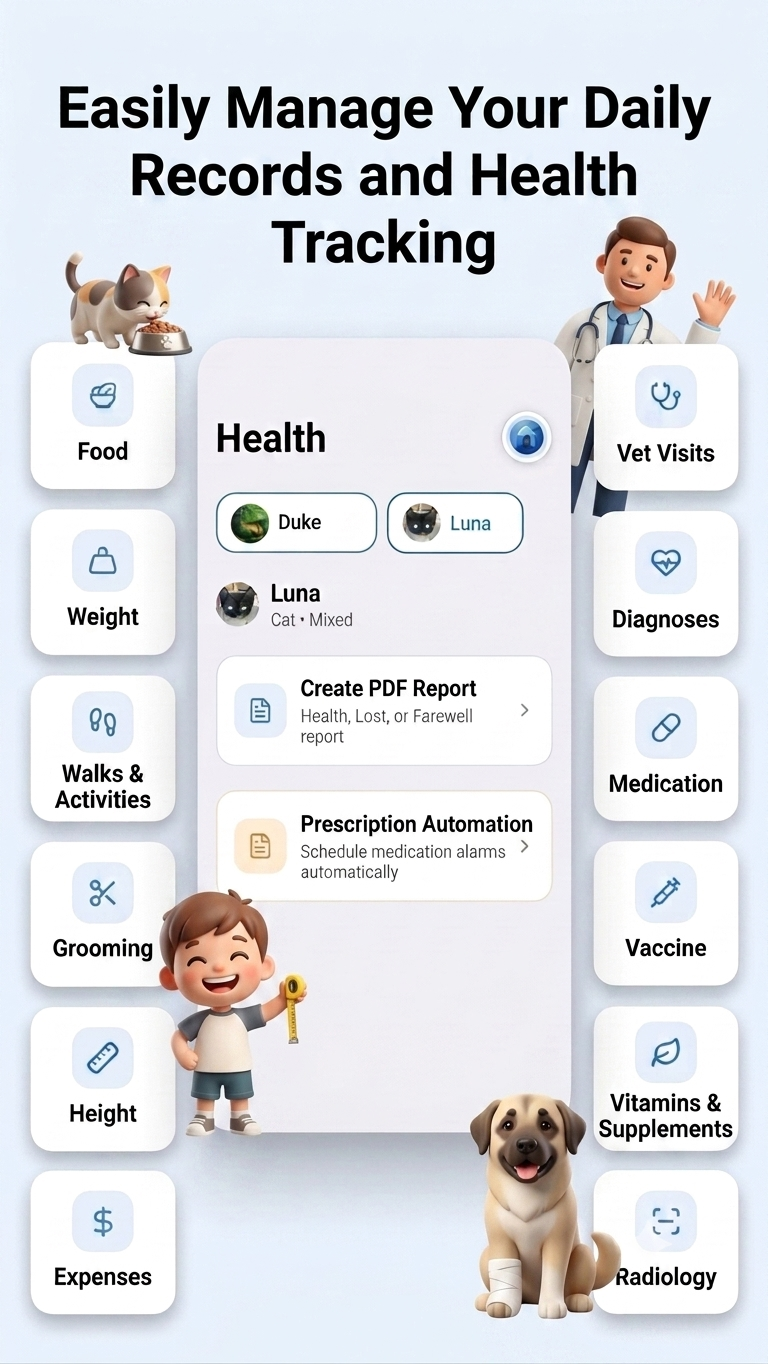
If there are no records yet for your pet, the Health tab lets you know and directs you to your first record with the "Add Pet" option. If you have more than one pet, you can easily switch between them using the strip at the top of the screen; your selected pet is remembered as you move to other screens in the app. When you select a pet that isn't in your active list, the relevant categories become read-only — you can't add new records for that pet, only view existing ones. In the Health tab, categories are presented in two groups: Daily Tracking (food, grooming, weight, height, walks, expenses) and Health Tracking (vet, medication, vaccine, vitamin, radiology, lab test). Tapping a category card opens a screen listing your records for that category. If there are no records, you'll see an empty state message that takes you straight to adding your first one. To add a new record, just tap the plus button in the bottom right; the form that opens shows fields relevant to that category. For example, for food you enter amount, type, and brand, and can optionally log water intake separately; for walks, activity type, duration, and distance; for weight and height, a single measurement value; for a vet visit, the vet, clinic, and reason; for medication, the medication name, form, dosage, and frequency; for vaccines, the vaccine name, form, dosage, frequency, and batch number; for radiology and lab tests, the type and vet information; for vitamins, the supplement name, dosage, and frequency; for diagnoses, the diagnosis name and symptoms. You can also add notes and photos to any record. Medication, vitamin, radiology, and lab test records can have multiple photos attached. To edit a record, just long-press the relevant card in the record list; this opens the same form used when adding it, pre-filled with the existing information. If the record you're editing was originally auto-generated from a prescription and you change its frequency, you'll see a warning that this change may also affect a linked reminder — in that case you'll need to update the Reminders section separately too. To delete a record, swipe the card to the left and tap the "Delete" button that appears; you'll be asked to confirm before it's deleted. You can view your records with a single tap; this opens a detail screen with all the information (and any photos), from which you can also go to the edit screen. If you have more than five records, they're grouped by month and, if needed, by year; you can tap these groups to expand or collapse them. Once you have at least two records in the weight, height, walks, food, or expenses categories, you can tap the chart icon in the top right of the screen to open a chart showing your changes over time, and optionally filter it by a specific date range.
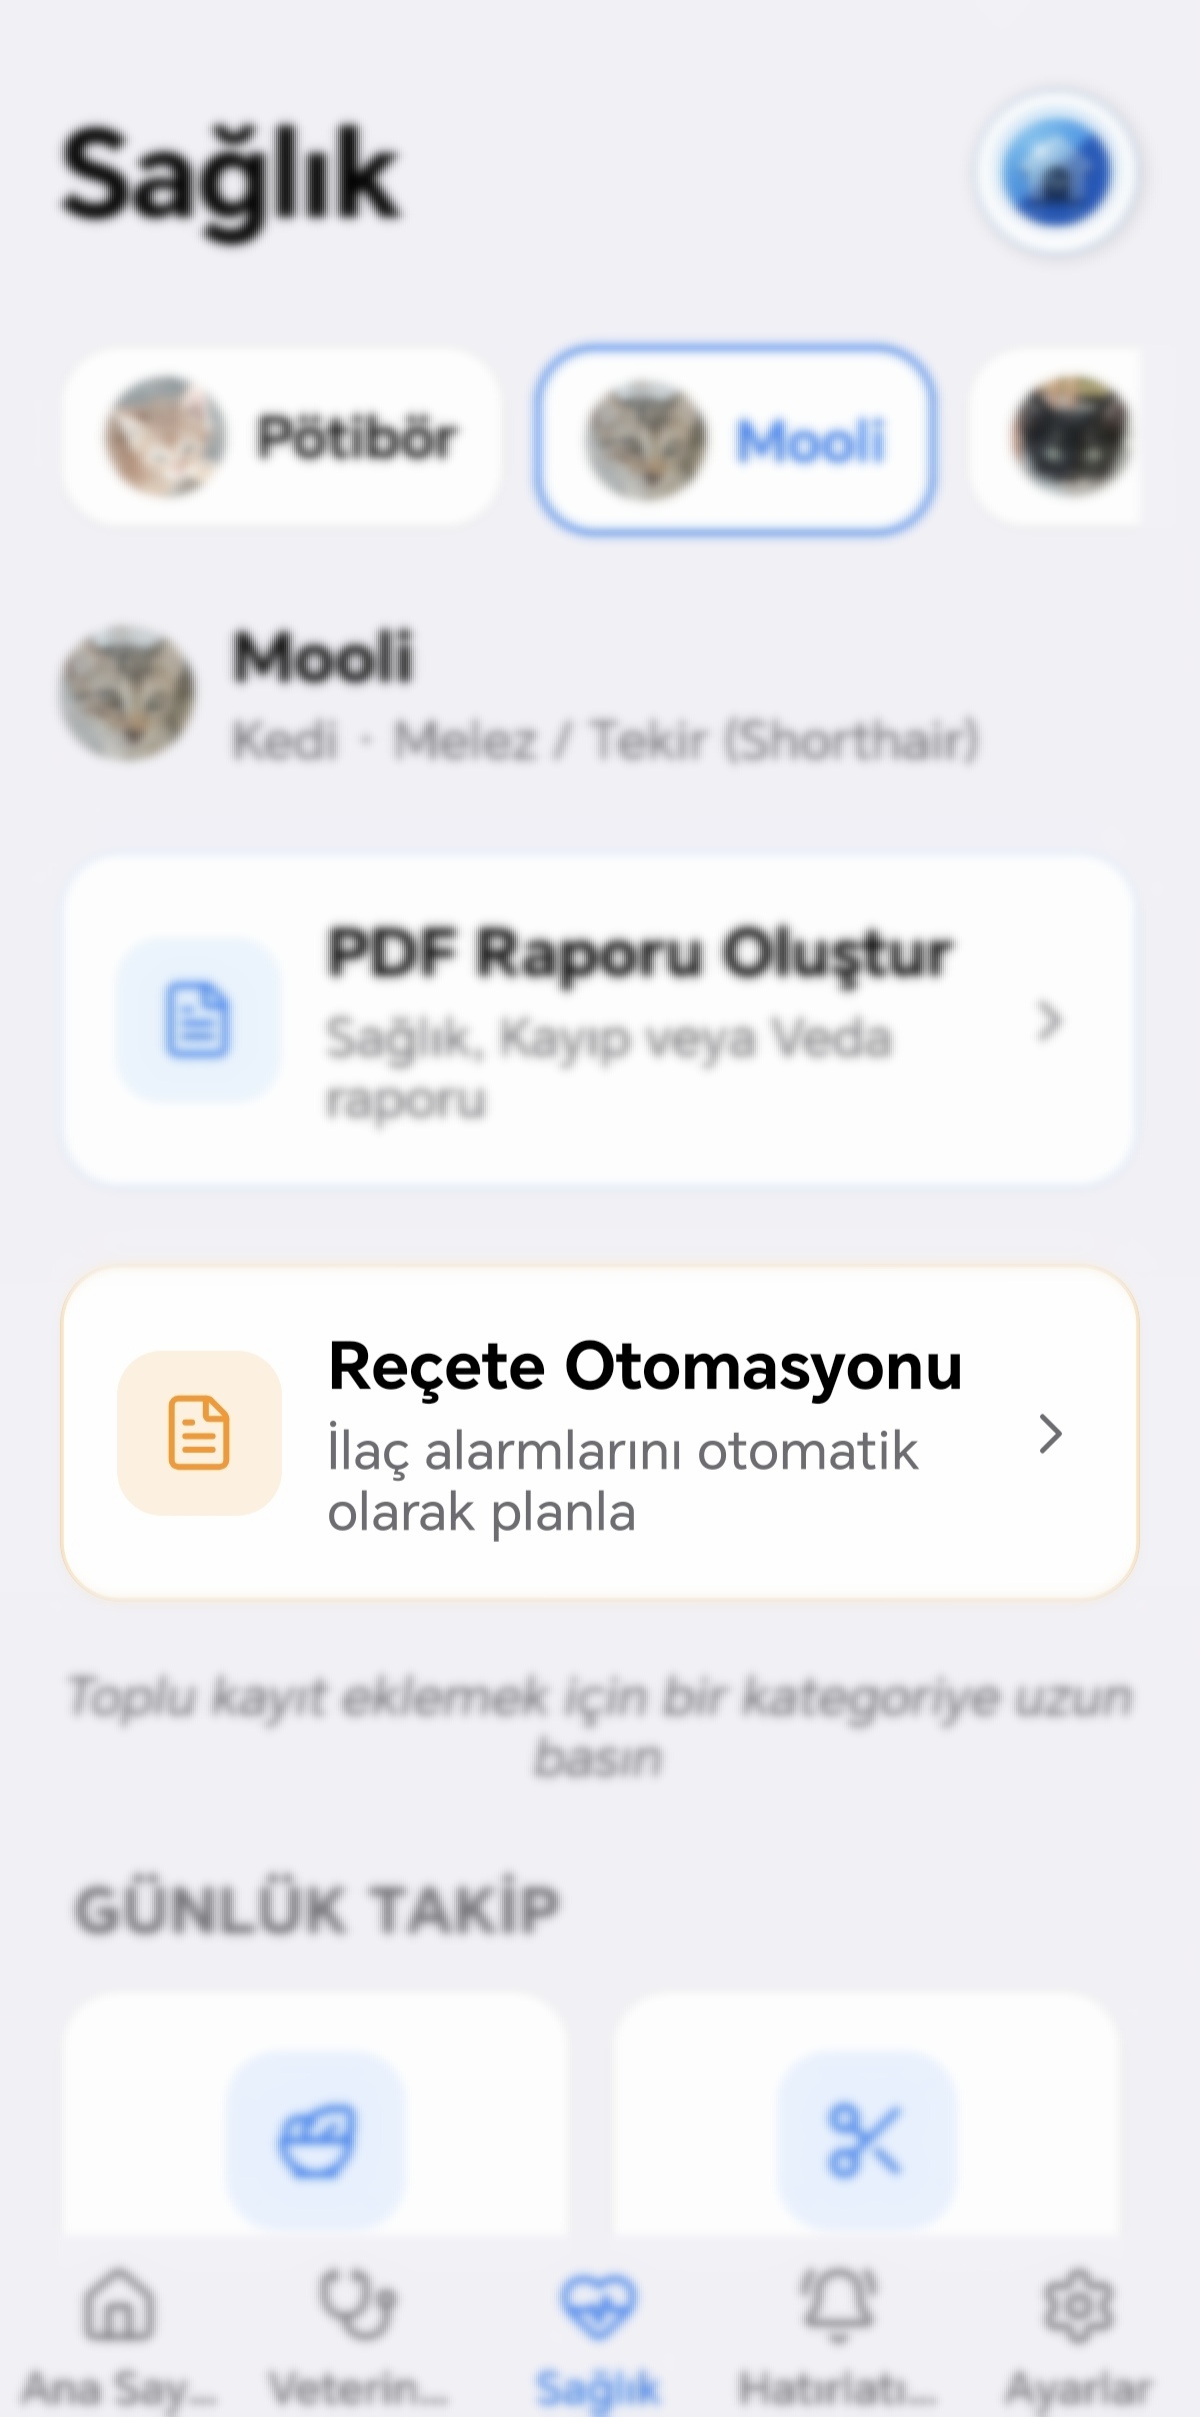
Prescription Automation
Automatically schedule medication reminders
PDF Reports
Create health, lost-pet, and farewell reports
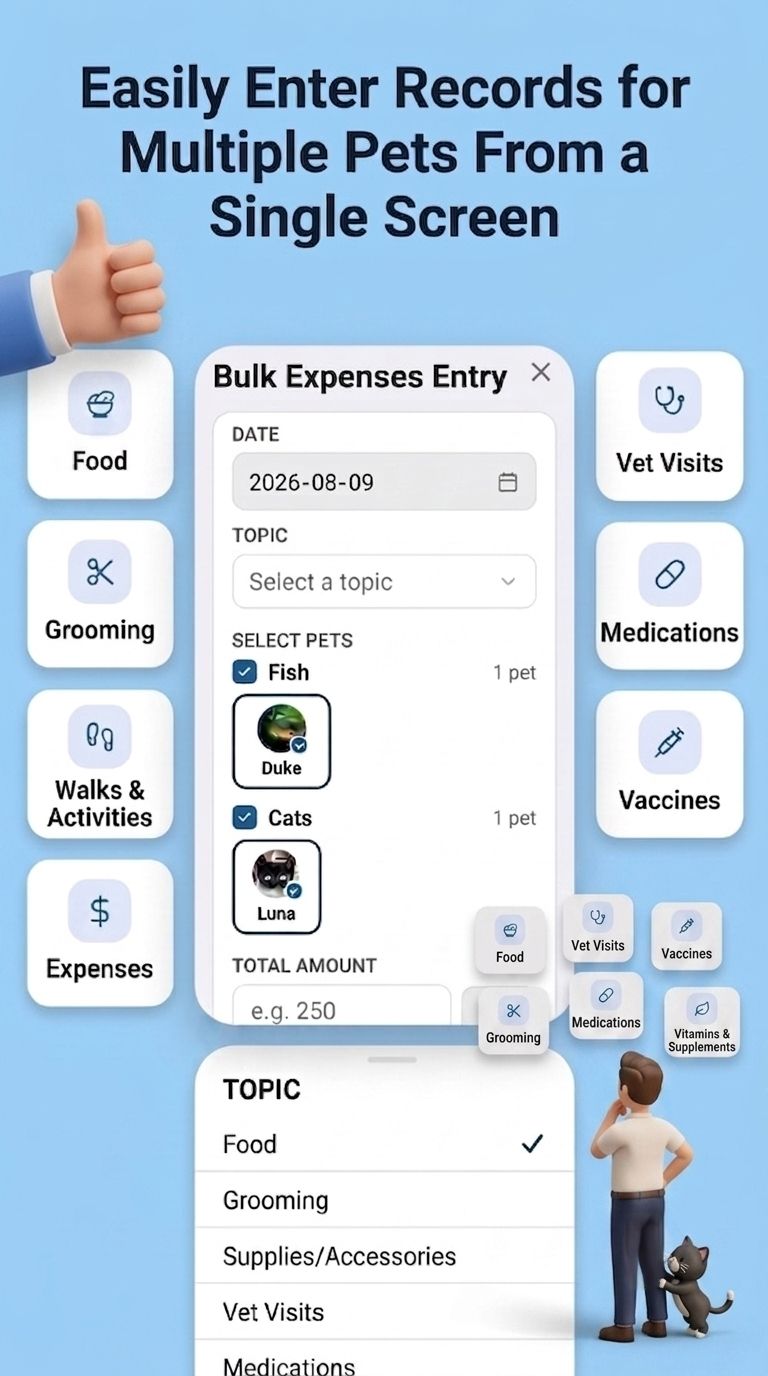
Bulk Entry
Add records for multiple pets at once
Prescription Automation
health.prescriptions.overview.jpg
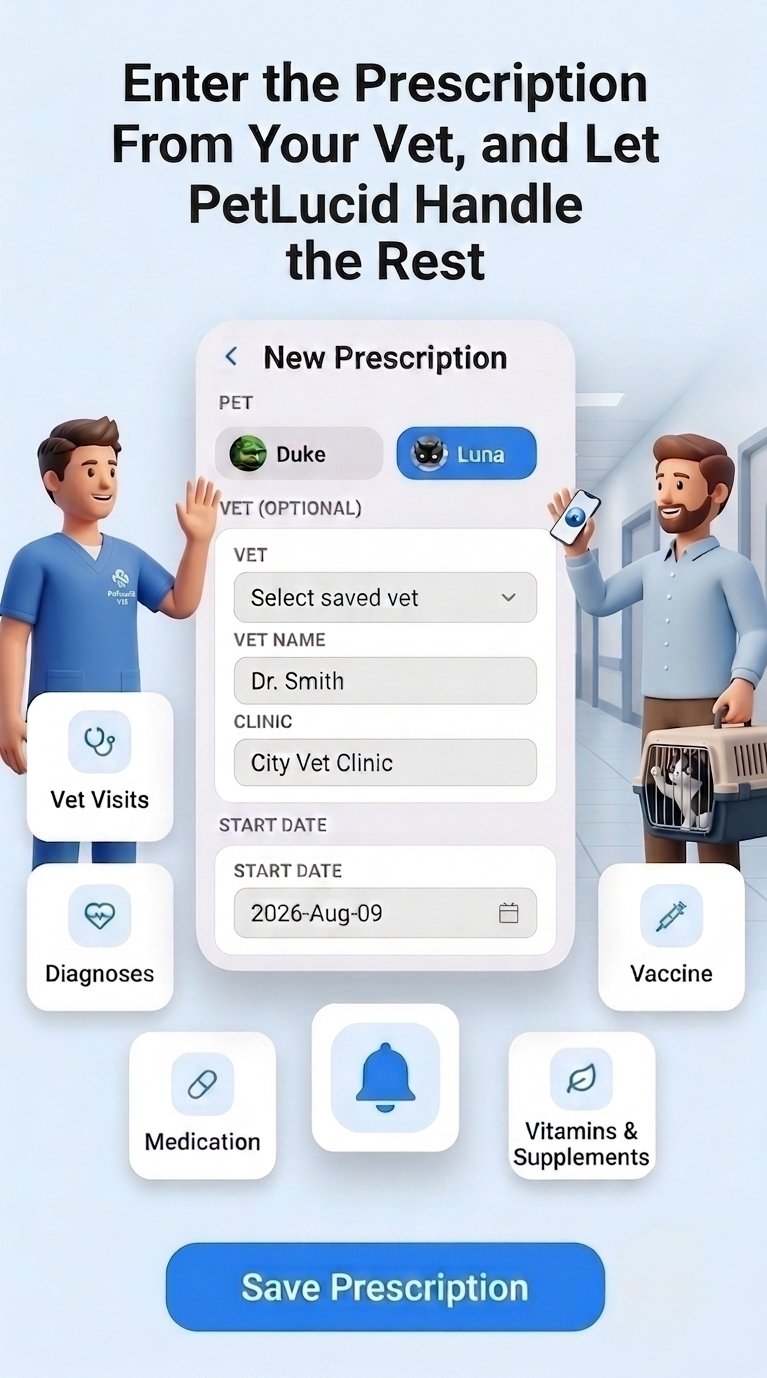
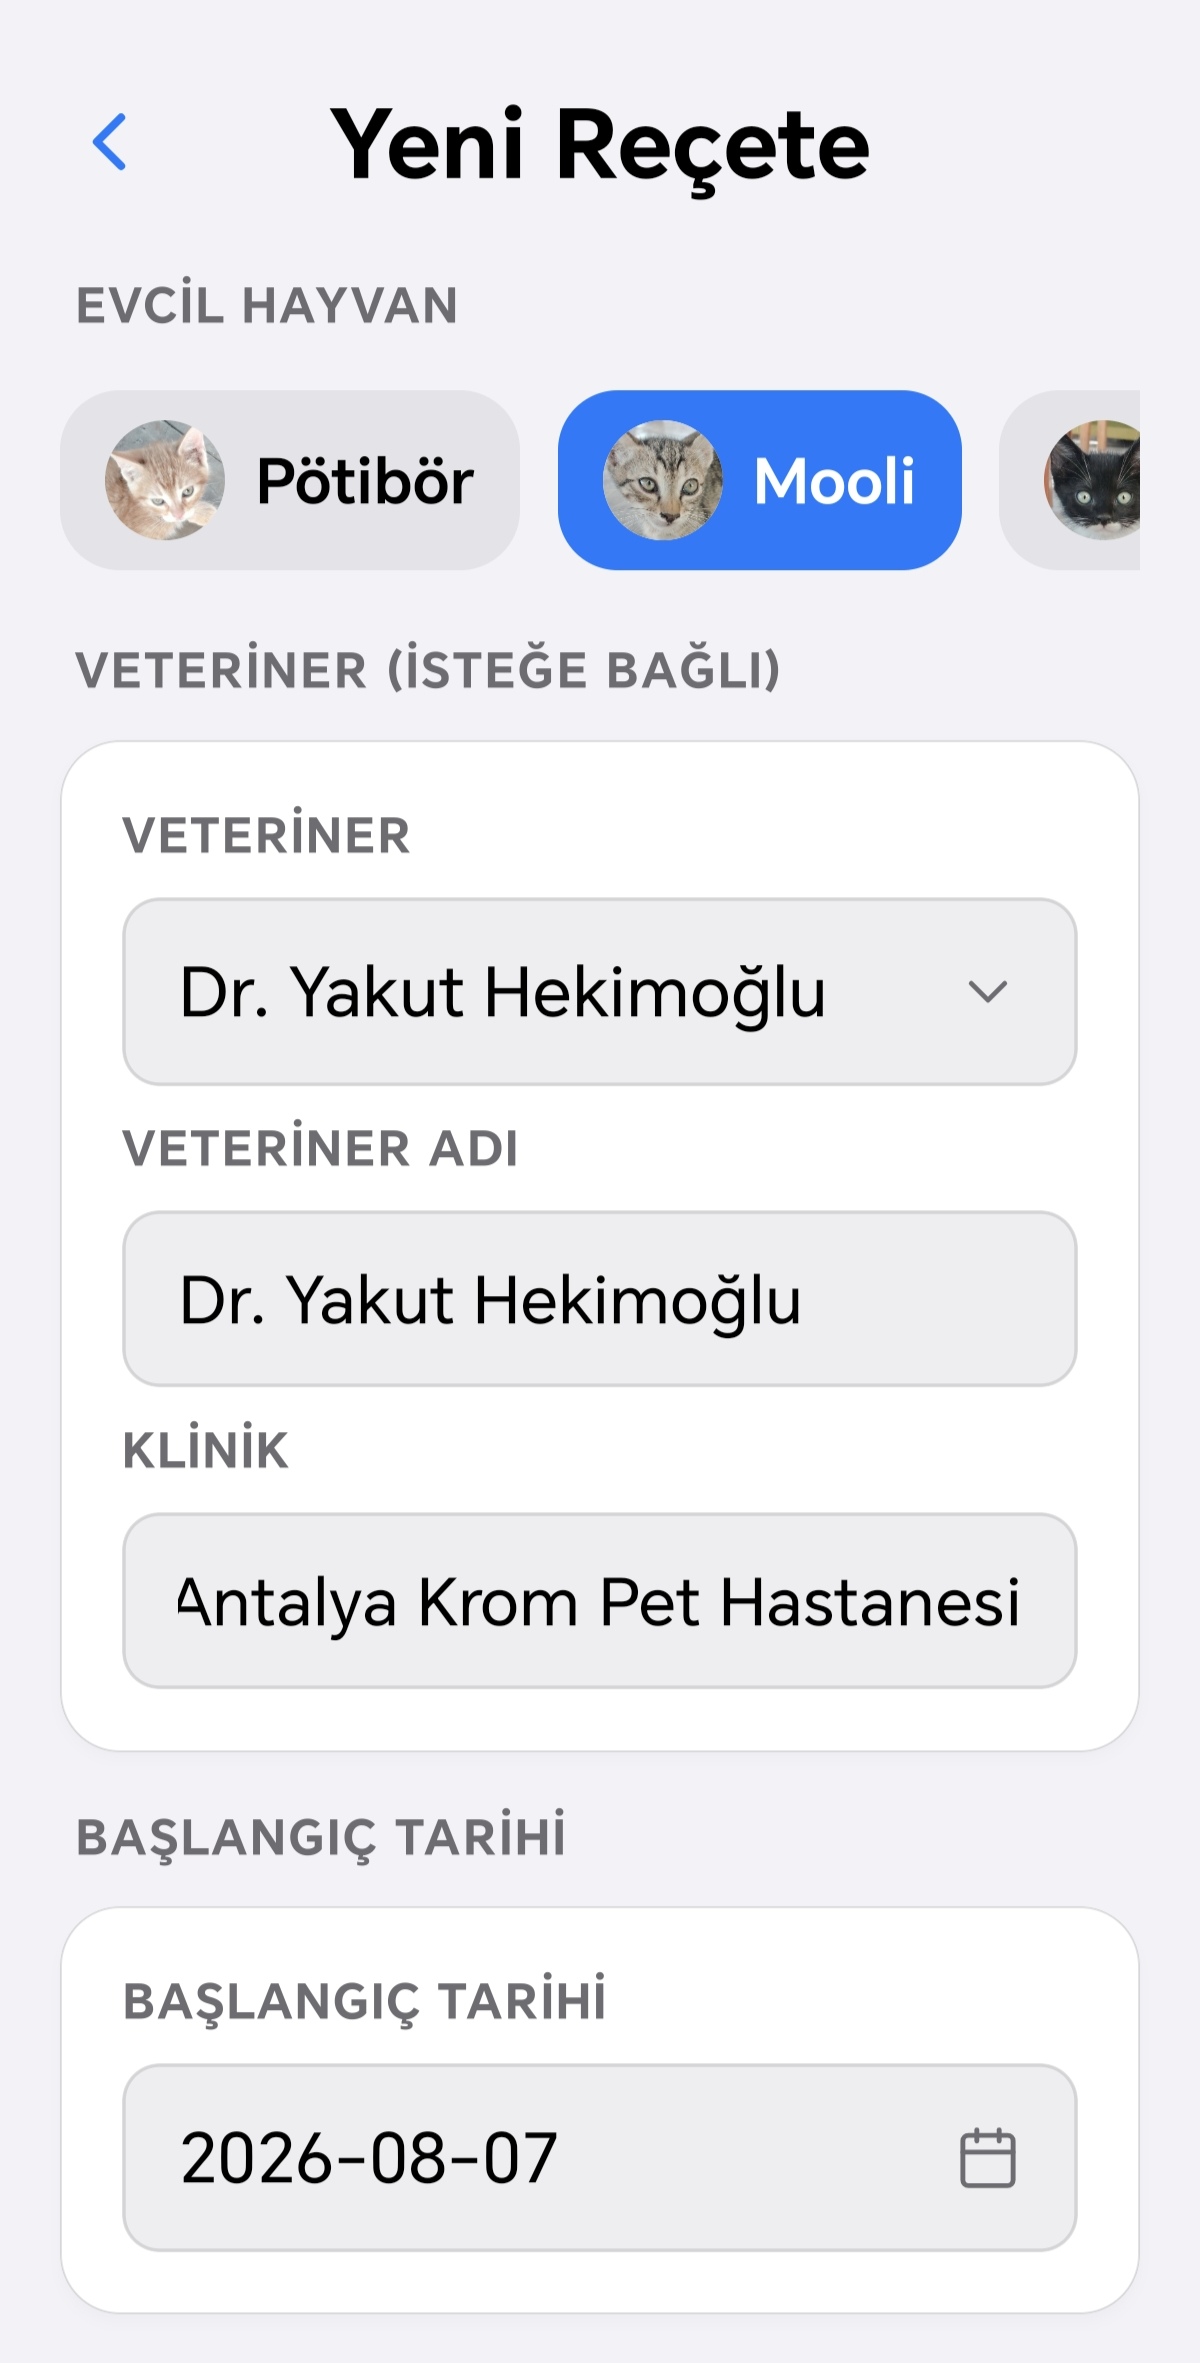
Prescription Automation lets you enter multiple diagnoses and medications from a single vet visit at once, and automatically creates the reminders linked to them (Premium only). You reach this screen from the prescription banner in the Health tab; this banner isn't available when a farewelled pet is selected.
First you enter the visit details: if you have more than one pet, you choose which one the record is for, then you either select one of your saved vets or type in the vet's name and clinic manually, and finally set the treatment's start date. This start date is shared by all the diagnoses you add below.
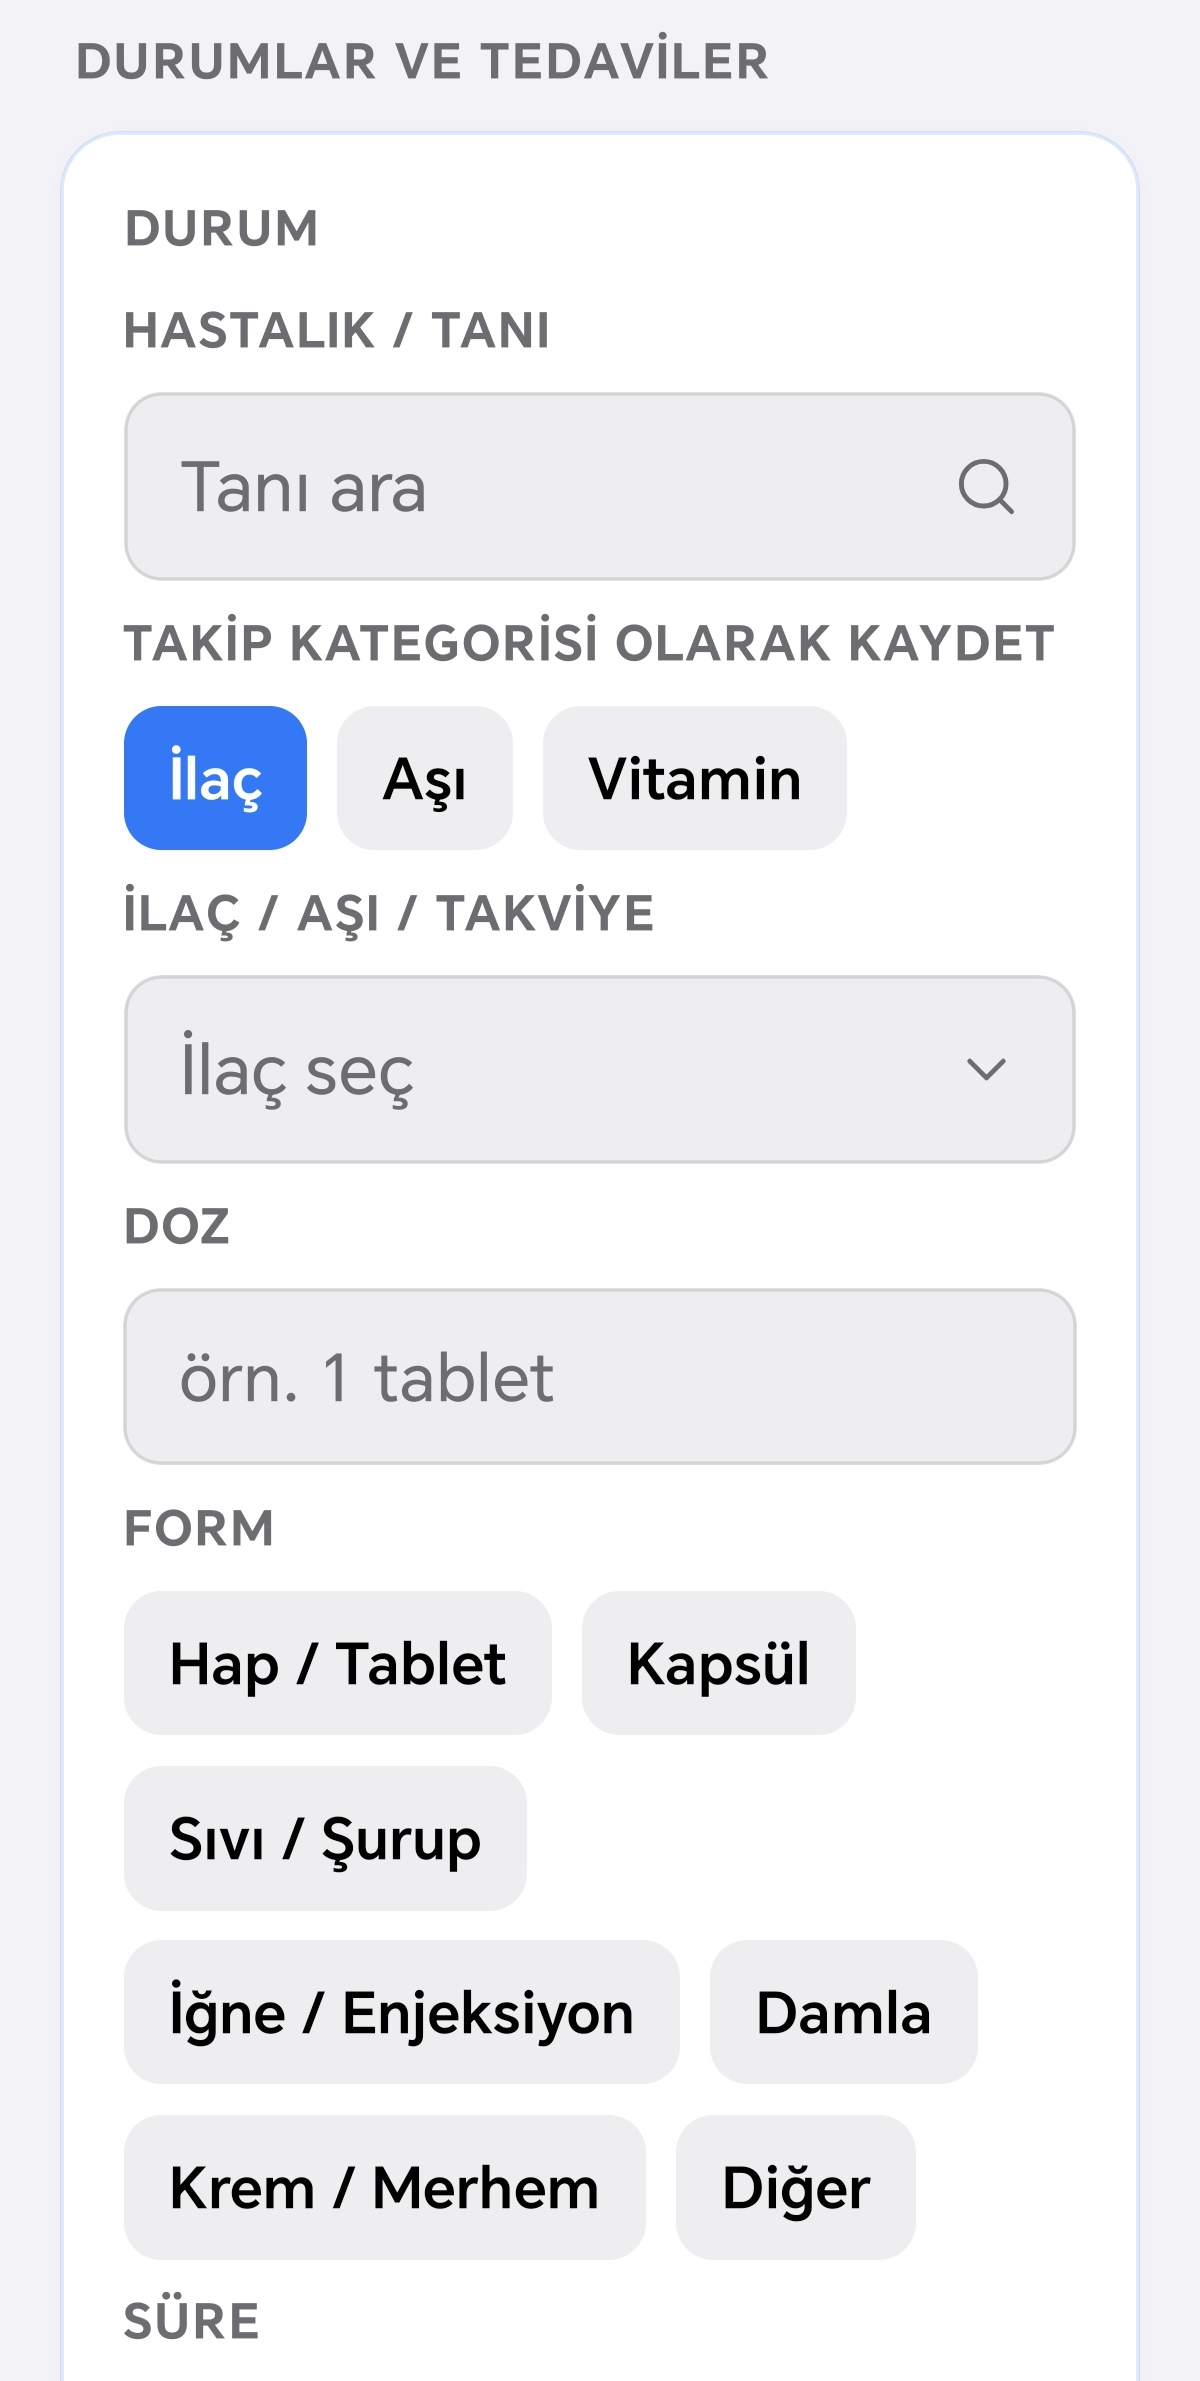
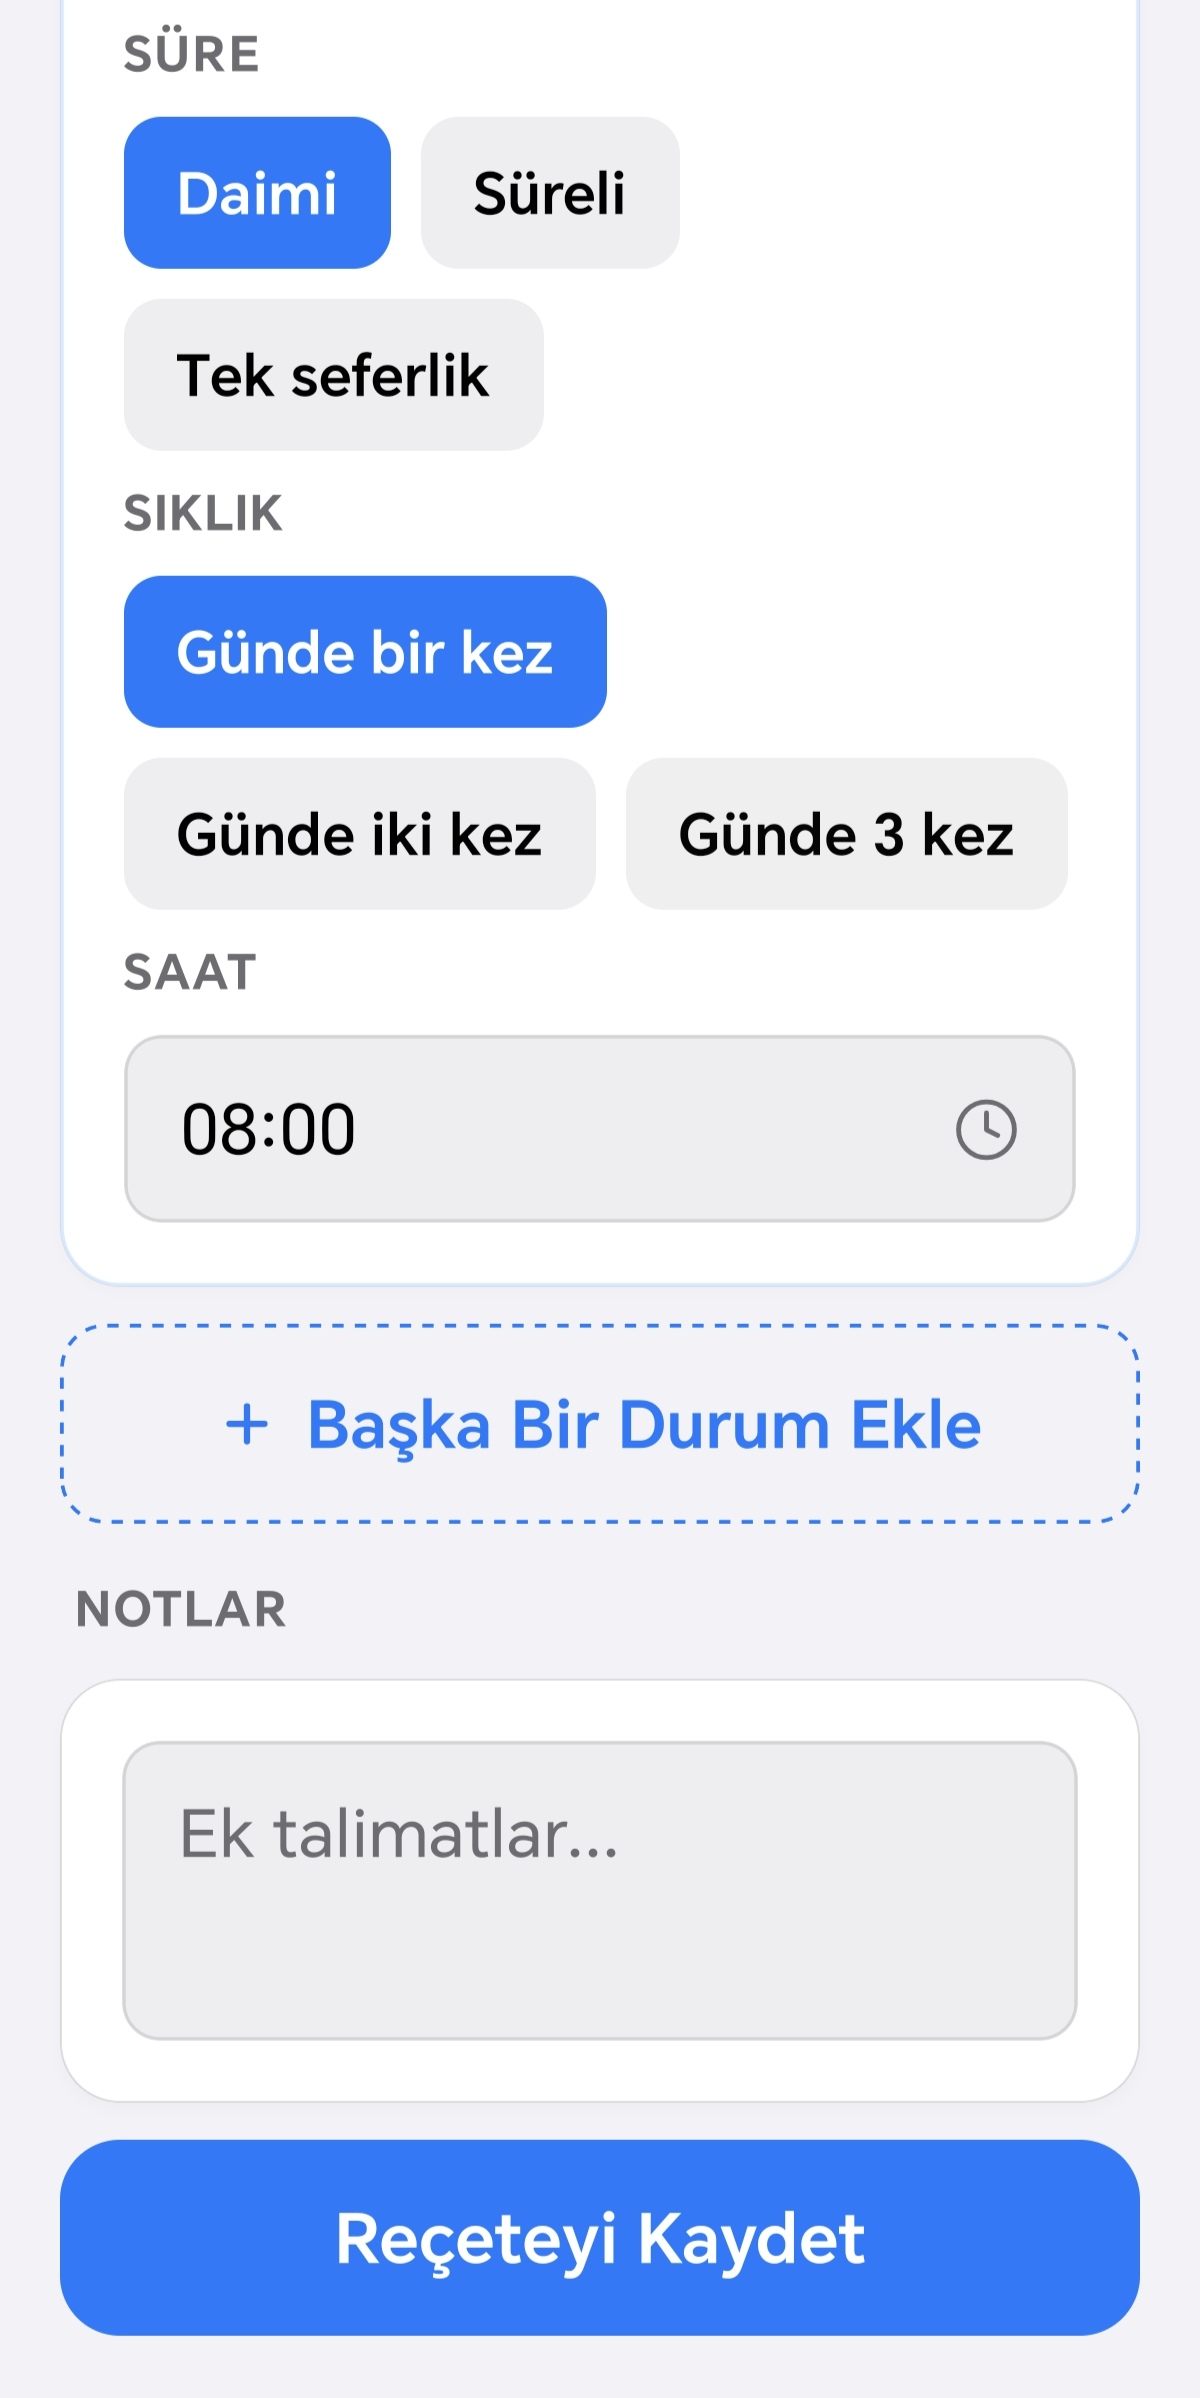
Next come the "status" cards. In the first card, you enter the diagnosis; once you pick one, commonly linked medications appear as suggestions at the top of the list. Each status card also lets you choose which category the record will be tracked under (medication, vaccine, or vitamin), then you specify the name, dosage, and (for medication or vaccines) form; if the medication or vitamin isn't in the list, you can enter it manually with the "custom medication" option. After that, you can set the frequency, treatment duration, and dose times, and see a summary of how many reminder doses will be created based on what you entered. If there's more than one diagnosis or medication for the same visit, you can open a new card with "Add another status," or remove an unneeded card using the X in its top right corner. You can also add a general note about the visit if you'd like.
When you tap Save, several things are created automatically for each status you entered: reminders are set up according to your chosen dose times, a record is added to the relevant health category (medication/vaccine/vitamin), and the diagnosis is automatically added to the Diagnoses section; these auto-generated records are marked in lists with a "✨ auto-generated" note. If you entered vet information, the visit itself is also added as a separate record under the Vet category. If you later edit the frequency of an auto-generated medication, vaccine, or vitamin record from the Health screen, and it has an active linked reminder, you'll see a warning reminding you that you also need to update the reminder separately.
PDF Reports
health.pdf.overview.jpg
This menu lets you create PDF reports for your pet (Premium only). When you open it, you choose from four report types: Health Report, Lost Pet Flyer, Farewell Report, and Category-Based Bulk Report. The Farewell Report can only be selected for a pet that isn't in your active list (i.e. has been farewelled); it's disabled otherwise.
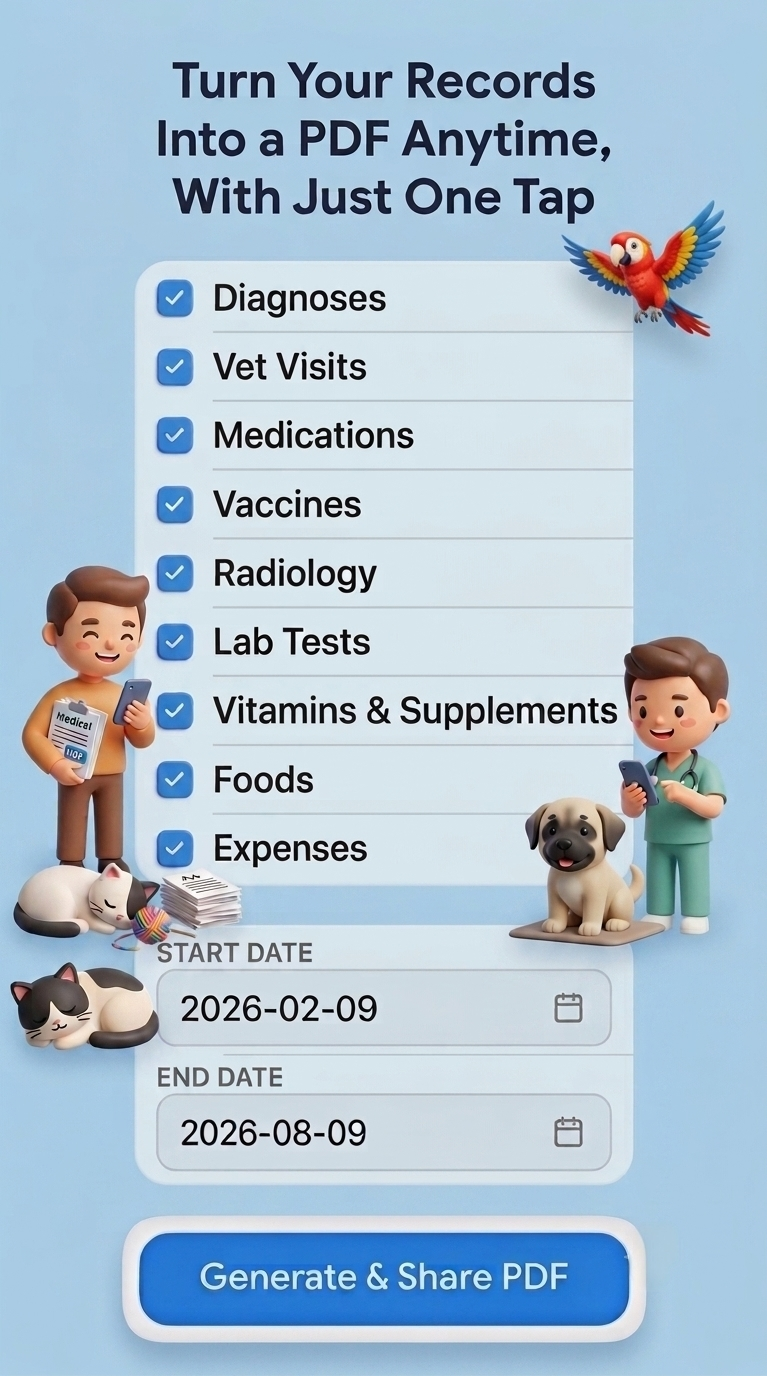
When you select Health Report, you first choose which categories to include (Diagnoses, Vet, Medication, Vaccine, Radiology, Lab, Vitamin, Food, Grooming, Weight, Height, Walks and Activities, Expenses); the number of records in that range appears next to each category, and "Select All" lets you mark them all at once. Next you choose a start and end date to set the period the report will cover. Based on your selections, the screen shows a summary of how many records and categories will be included. Tapping "Generate and Share" produces the PDF; it includes your pet's profile, the owner/caretaker profile, assigned vet information if any, and a table of records for each category you selected (with charts too, if there's enough data).
For the Lost Pet Flyer, you first add up to 3 photos (chosen from your gallery, with the first one marked as the profile photo). Then, in a free-text field, you write details like the species, distinguishing features, and last known location in your own words. Next, you mark whether to include your address and phone number in the contact information, and can edit these if you'd like. If you include your phone number, a QR code encoding it is automatically added to the flyer (with a "Scan to call" note); if you don't include it, no QR code appears. Tapping "Generate Flyer" produces an A4-size lost-pet PDF with a red border; it includes your pet's photos, name, species/age, the note you wrote, and the contact information you selected (along with the QR code, if included).
For the Farewell Report, you first add up to 4 photos, then write a free-form farewell message about your pet. When you tap "Generate," the PDF includes the profile information, birth/farewell date, the message you wrote, the owner/caretaker profile, a summary of total records/vet visits/medications/vaccines, and vet information if available.
For the Category-Based Bulk Report, you first select multiple pets (all are selected by default), then mark the categories you want from the same 13 used in the Health Report, and finally set a date range. Farewelled pets are also included in this report's list. Tapping "Generate and Share" produces a PDF that combines the records of all selected pets into a single report, with each table noting which pet it belongs to; this report doesn't include charts, only tables.
Bulk Entry
health.bulk.overview.jpg
Logging the same record for every pet one by one can take a lot of time. Bulk entry is designed to help with exactly that (Premium only). It lets you create the same record for multiple pets in a single entry: you fill in one bulk record, and PetLucid applies the relevant data to each selected pet's own records individually.
Long-pressing a category on the Health screen takes you to that category's bulk entry screen. You can create bulk records for food (including water tracking), grooming, walks and activities, expenses, vet visits, medication, vaccines, and vitamins. Categories tied to a single pet, such as diagnoses, weight, height, radiology images, and lab tests, only support individual entry.
In the form, you first set the date, then choose a sub-item (this varies by category — for food it might be a type like meat, plant-based, or wet food, while for walks and activities it could be an activity type like walking, running, or swimming). Pets matching your selection are automatically filtered from your active list and offered up for you to choose. Bulk entry requires at least two matching pets, and at least two pets must remain selected when you save — the record can't be completed otherwise.
For food and expense categories, you also enter a "total amount," which PetLucid splits equally across the pets you selected. You can adjust these shares afterward. For categories like grooming, walks and activities, vet visits, medication, vaccines, and vitamins, the shared values you enter (such as duration, reason, or dose) are applied identically to every selected pet.
For records where you enter a "total amount," that total is automatically split into an equal share for each pet, but you can also enter custom values for each pet individually. If you plan to enter custom values, we recommend leaving the "total amount" field empty — PetLucid will calculate the total for you once you're done. If you enter the total up front and then change one pet's share, the total stays fixed and the other pets' shares update automatically to absorb the difference proportionally. There's a limit to this adjustment: every pet's share must stay at or above 0.5 units, so you can't raise one share so much that it pushes the others below that floor — once you hit the limit, you'll see a warning showing the highest value you can enter. The Reset option always lets you return to an equal split.
Tapping a card in the bulk record list shows its details; long-pressing opens the edit screen. You can delete a record by swiping it left, which removes it entirely for every pet in the group. You can also view a bulk record from the Health screen of any pet it belongs to — that view also lists the names and photos of the other pets included in the same record. A bulk record's date can only be changed through the bulk entry screen's edit view; on an individual pet's edit screen, the date field is read-only and shows a note explaining that it's managed from the bulk record. If you remove a pet from a record via its own Health screen (by deleting its share) or delete the pet permanently, that pet drops out of the bulk record: for records with shared values, the remaining pets' shares stay exactly as they were, while for records with a "total amount," the total stays fixed and is redistributed proportionally among the remaining pets. If this leaves only one pet in the record, the record stops being a bulk record: the total amount (if any) is transferred to that pet in full, and it continues as a normal, individual record on that pet's own Health screen.
If one of the pets in a bulk record is moved to the farewell list, that record becomes read-only. A read-only record can't be changed either from the bulk entry screen or from any of the other pets' individual records, which prevents data inconsistencies. This lock lasts until the pet in question is returned to the active list.

Reminders Guide

In this menu, you create and manage reminders for your pets: food, walks, vet visits, medication, vaccines, vitamins, grooming, imaging, and lab tests.

reminders.overview.jpg
If you have no reminders yet, an empty state appears on the screen; tap the button there to start creating your first reminder.
Tapping the plus button at the bottom right opens the new reminder screen. Here, in order: you type a title; you choose which pet(s) the reminder applies to (you can select more than one pet); you choose one of nine types (Food, Grooming, Walk, Vet Visit, Medication, Vaccine, Vitamin, Imaging, Lab Test); you choose a duration ("Permanent" repeats indefinitely, "Limited" lasts 2, 3, 5, 7, 14, or 30 days or a custom number of days you enter, "One-time" reminds you only once on the date you pick; you can also use "Specific days only" to mark certain days of the week); you choose a start date; you choose a frequency (1, 2, or 3 times a day — as many time fields open as the number you choose, and you set a separate time for each; when you choose more than one time per day, a separate reminder record is created for each time). Tapping "Save" creates the reminder(s) and schedules notifications for the times you set.
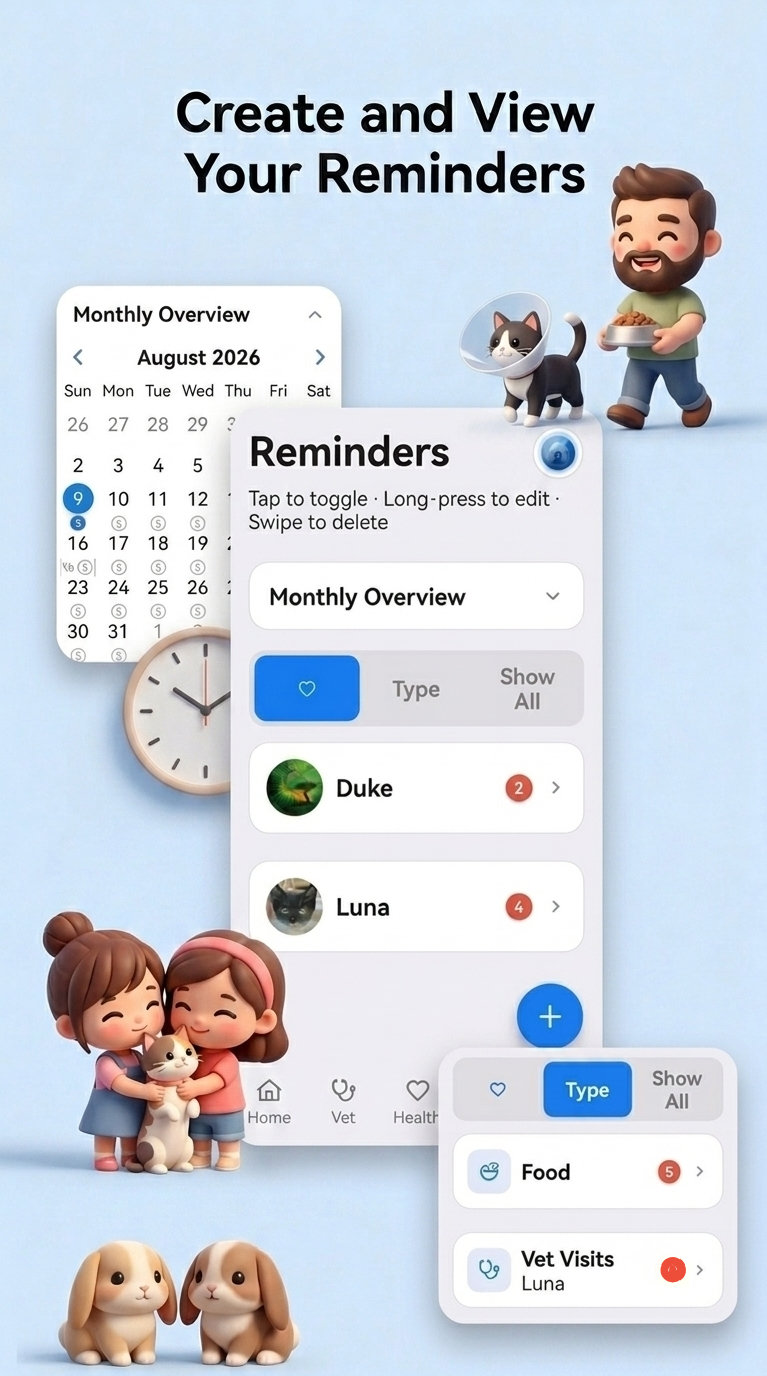
On the home screen, a monthly calendar sits above the list; it's collapsed by default, and you can tap it to expand or collapse it. When expanded, days with active reminders show a small number badge, and days with a vet reminder also show a stethoscope icon; if you press and hold a day, these badges are also shown temporarily for past days.
You can browse reminders in three different views: By Animal (each pet has its own folder, with type-based subfolders inside), By Type (each type has its own folder, with pet-based subfolders inside), and Show All (a single flat list). You can tap folders to expand or collapse them, and see a red badge showing the number of active reminders. You can also long-press a folder to see a chronological list of its upcoming reminders — long-pressing a pet shows all its reminders, long-pressing a type shows that type across every pet, and long-pressing a subfolder (e.g. a specific type inside a pet's folder, or a specific pet inside a type's folder) narrows the list to that exact combination.
Tapping a reminder in the list instantly toggles it on or off (active/inactive). Pressing and holding it opens the edit screen, where you can change all the same fields as in the add screen. Swiping a reminder to the left reveals a delete button; tapping it asks for confirmation, and confirming permanently deletes the reminder.
When you mark a pet as passed away from the pets menu, all reminders belonging to that pet are automatically set to inactive here (their notifications stop), but the reminder records themselves are not deleted. If you bring the pet back to the active list, all of that pet's reminders are reactivated in bulk. If you permanently delete a pet, all reminders and notifications linked to it are also permanently deleted.

Settings Guide

When you open Settings, your profile card appears first. If you haven't entered a name yet, the card shows "tap to add a name." Tap the pencil icon on the card to enter edit mode. In this mode you can: tap your photo to pick a square (1:1) cropped profile picture from your gallery, type your name, choose either the "Owner" or "Caretaker" role, set your birth date using a date picker or clear it with the X icon, and enter your address and phone number. Tap the checkmark to save your information, or the X icon to cancel editing. When you're not in edit mode, any birth date, address, and phone number you've entered are shown line by line on the card. All the information you enter is stored only on your device; it's never sent to any server and never shared with anyone, including the PetLucid team. PetLucid takes a fully "device-first" (local-first) approach to your data: your profile information never leaves your phone. Tapping the profile card opens and closes a panel showing a summary of your expenses recorded that month; while the panel is open, tapping the "expense summary" row that appears below it opens a screen where you can select your pets and a date range to generate an expense summary as a PDF. Below the profile card is the Premium card; tapping it takes you to the Premium screen. In the Appearance section you can choose between light, dark, or system theme. In the Language & Data section, tapping the language row opens a screen where you can choose from 20 languages, including Turkish, English, German, French, Spanish, Italian, Dutch, Swedish, Korean, Japanese, Chinese, Polish, Portuguese, Russian, and more. Tapping the Backup row takes you to the backup and restore screen. In the Support section, tapping the email row opens your device's mail app with a new draft addressed to petlucidapp@gmail.com. Tapping About takes you to a screen with information about the app.

Backup & Restore
Back up and restore your data
Free & Premium Plans
Compare plans
Backup & Restore
settings.backup.overview.jpg
When you open the Backup & Restore screen, an info card at the top explains what backups are for. Just below it, four boxes summarize the number of pets, health records, reminders, and prescriptions currently stored on your device. If you've made a manual backup before, a green checkmark badge showing its date also appears here. In addition, if you have at least one pet and it's been more than 14 days since your last manual backup, a gentle reminder card appears on the home screen; tapping it takes you straight to this screen.
This information is also backed up automatically as you use the app: whenever your data changes and at least 6 hours have passed, the 3 most recent automatic backups are stored in your device's own storage (never sent to a server). Tapping "Restore from Automatic Backup" opens a list where you can choose which of these 3 backups to restore, along with their date and time; once you confirm your choice, the restore process begins.
Because the data you add to PetLucid is kept only on your device, we recommend occasionally saving a copy to your personal Google Drive or iCloud account as well. We can't do this on your behalf — as a serverless, fully "device-first" app, we've deliberately chosen not to take on that responsibility. The good news, though: you can share the backup file you create with family members or caretakers who look after your pet with you, so you can share your records with your loved ones if you'd like.
In the Actions section, tapping "Back Up Now" first asks whether you'd like to encrypt your backup. If you continue without encryption, your backup file is created in plain JSON format and your device's share sheet (AirDrop, email, save to files, etc.) opens. If you choose encryption, you're asked to set a password; after entering and confirming it twice (via "Encrypt & Export"), your backup is encrypted on your device with AES-256 and exported through the same share sheet. This encryption happens entirely on your device; the password you set is never sent to any server, and no one — including the PetLucid team — can see or know it. This means that if you forget your password, no one can decrypt or restore that backup on your behalf.
Tapping "Restore" asks you to choose a backup file from your device. If the file you select isn't encrypted, you're asked to confirm the restore, and once you confirm, all of your current data is overwritten. If it's encrypted, a screen opens asking for your password first; entering the wrong password shows an error and asks you to try again, and entering the correct password starts the restore process.
A warning card at the bottom of the screen explains that restoring a backup completely replaces all current data on your device with that backup; the restore process doesn't merge records one by one, it overwrites your existing records entirely.
Free & Premium Plans
settings.premium.overview.jpg
When the Premium screen opens, if you don't have premium yet, you'll see a "go premium" heading and a badge showing the one-time lifetime price; if you already have premium, a "your premium is active" message is shown instead. Just below, two plan cards are laid out side by side.
You can use PetLucid for as long as you like with a single pet profile, all health categories, reminders and notifications, theme and language options, manual backup features, and the ability to export your expense breakdown as a PDF. We're glad to help you and your pet.
Marked with a "Best Choice" badge, the Premium plan offers everything in the Free plan plus: Unlimited pet profiles — if you have more than one pet, you can track all of them under a single account. Bulk record entry — for multiple pets at once, you can create food, medication/vitamin/vaccine, or walk records from a single screen by entering shared details (date, frequency, etc.) just once; you can still edit pet-specific fields like dosage individually when needed. Prescription automation — automates your prescription data entry. When you use prescription automation, you enter the relevant information and reminders from a single screen, and PetLucid files them where they belong on your behalf, so you don't need to enter data into separate sections by hand. PDF reports — generate and export your pets' health and expense records as a PDF report for any date range you choose. You can also quickly create a Missing Pet flyer PDF with your pet's photo and your contact information using the Missing Pet Flyer feature, which we hope you'll never need to use; for a pet you've said farewell to, you can also generate a memorial report as a PDF containing your farewell message and a summary of their records. Ad-free experience — use the app completely free of ads.
If you don't have premium yet, you can tap the purchase button showing the price to start a one-time lifetime premium purchase, or tap the "restore purchases" link below it to restore a previous purchase to your account. If you already have premium, you'll see a confirmation card instead, indicating that your premium is active. Premium is a one-time, lifetime purchase; even if you switch phones or move to a different device, you can use "restore purchases" with the same account to seamlessly set up your premium again on your new device.